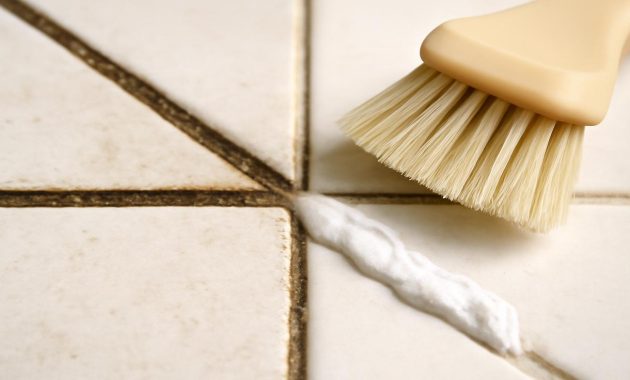
The grout was the first thing I noticed when I moved into the old apartment. Not the view of the trees leaning toward the balcony, not the wide windows that promised soft afternoon light. It was the floor—white tiles mapped with thin, blackened lines like a tired crossword puzzle. No matter how much I mopped, the lines stayed dark, stubborn, and vaguely accusatory. You know that feeling? When your place is technically “clean,” but the floor grout whispers otherwise every time you walk through the kitchen.
The Day I Stopped Blaming the Mop
For the longest time, I didn’t realize grout has a personality of its own. Tiles are easy: swipe, rinse, done. Grout, though? It’s porous, like tiny tunnels running between tiles. Whatever passes over the floor sinks into those little channels—mud, oil, spilled coffee, that mysterious sticky patch under the dining table no one will admit to.
My first instinct, like most people’s, was to nuke it. Vinegar, everyone says. Or bleach. The harsher the better, right? One Saturday, armed with a spray bottle of vinegar, I misted the floor like I was blessing it with holy water. The smell hit first—sharp, sour, the kind that crawls up your nose and sits there for hours. The grout lightened a little, sure, but my eyes stung and my kitchen smelled like an abandoned pickle factory. Bleach was even worse: burning throat, itchy hands, and that uneasy feeling that I was slowly peeling the life off the floor as much as the grime.
It took exactly two tries with harsh stuff for me to realize: there has to be another way. Something that doesn’t make the room smell like a chemistry lab. Something you can do wearing pajamas, without a mask and gloves, without opening every window in midwinter.
The Weirdly Satisfying Non-Vinegar, Non-Bleach Hack
The answer came from a neighbor, the kind of person who always has fresh herbs on the windowsill and a house that somehow smells like sunshine. We were standing in the hallway when I casually mentioned my grout problem, expecting the usual “try bleach” response. Instead, she smiled and said, “Oh, no, don’t do that. You just need three things: baking soda, dish soap, and warm water. Maybe some hydrogen peroxide if it’s really bad.”
I stared at her. “That’s it?”
“That’s it,” she said. “No vinegar, no bleach, no headaches. And it works faster than you think.”
I went home, suspicious but curious. There’s something quietly thrilling about turning your kitchen into a tiny lab, especially when the ingredients are so ordinary they feel almost too gentle to do anything. But this is where grout is deceptive: it doesn’t need brutal force; it needs smart chemistry and a bit of patience.
The Simple Mix That Changes Everything
Here’s the basic blend that finally made those dark grout lines loosen their grip on my floors:
- Baking soda – the scrubby part, fine enough not to scratch, tough enough to lift dirt.
- Mild dish soap – cuts through greasy, grimy buildup that makes grout look permanently dirty.
- Warm water (or hydrogen peroxide for very stained grout) – helps loosen what’s trapped deep inside.
You mix the baking soda with a little dish soap and just enough warm water to make a thick paste. For really dark grout, you swap part of the water with hydrogen peroxide, which gently brightens without the punch-in-the-face smell of bleach. No fumes, no tears, just a strangely soothing, gloopy mixture that feels like you’re about to frost a very strange cake.
Step by Step: From Blackened Lines to Quietly Shining Grout
The first time I tried this, I didn’t expect much. I scooped the paste with an old spoon and pressed it into a stretch of grout in front of the fridge, where traffic was heaviest and the dirt most obvious. There was something deeply satisfying about watching the pale paste line each dark channel, softening the sharp contrast that had bothered me for months.
Here’s the rhythm that ended up working best, and feels almost meditative when you get into it:
- Vacuum or sweep first. You don’t want dust and crumbs getting in the way. Clean tiles mean the paste can focus on what matters: the grout.
- Spread the paste along the grout lines. You don’t need much—just a slim bead down each line. An old toothbrush or small brush works perfectly to nudge it into the gaps.
- Let it sit. Ten to fifteen minutes is usually enough. During this time, the mixture quietly does its job, loosening the filth that mop water alone never touches.
- Gently scrub. This is the oddly satisfying part. You don’t have to scrub like a machine—small circles, light pressure, following each line like you’re tracing a path on a map.
- Wipe and rinse. A damp cloth or mop lifts the paste away, taking the loosened grime with it. Change the water as it gets cloudy.
The transformation wasn’t dramatic like those “before and after” photos where a disaster turns into a showroom. It was subtler, more honest. The grout didn’t suddenly glow; it just looked… calm. Lighter. Less haunted. The kitchen suddenly felt fresher, as if someone had quietly opened a window in the floor.
A Pocket Guide to the Ingredients
It helped me to think of the ingredients in simple roles, like this:
| Ingredient | Role | Why It Helps Grout |
|---|---|---|
| Baking soda | Gentle abrasive | Scrubs without scratching tiles, loosens stuck-on dirt in pores. |
| Dish soap | Degreaser | Breaks down oils and grime that make grout look permanently dark. |
| Warm water | Carrier | Helps the paste spread and soak into grout’s tiny pores. |
| Hydrogen peroxide (optional) | Gentle brightener | Lifts deeper discoloration without harsh bleach fumes. |
Why Your Grout Turned Black in the First Place
There’s a reason grout feels so unforgiving: it’s basically a sponge set in stone. When you mop, especially with a bucket that isn’t changed often, dirty water slides politely off the tiles—but sinks into the grout instead. Think of it like a riverbed: the water moves on, but the mud gets left behind in the cracks.
Layer by layer, tiny bits of life settle in: dust, food, soap residue, oily footprints from a quick walk to the car and back. Over time, the pale lines between your tiles darken, not because you’re messy or lazy, but because grout was designed to be functional, not glamorous. It’s there to cushion and seal, not to stay magazine-perfect.
Harsh cleaners, ironically, can make things worse. Bleach may lighten stains, but it can also weaken grout over time, making it more porous. More porous means more places for dirt to settle. Vinegar has its place in cleaning, but on some grout and certain stone tiles, it can slowly etch, roughen, and dull the surface. Meanwhile, your nose and eyes get to suffer every time you “deep clean.”
The baking-soda-and-soap paste doesn’t bully the grout. It just nudges the dirt out, bit by bit, and lets you rinse it away. It’s less drama, more long-term peace.
The Subtle Joy of Clean Grout
I didn’t expect something as small as grout to affect how I felt in my home, but once those lines lightened, the entire room shifted. It wasn’t an Instagram reveal moment; it was quieter than that. The floor no longer shouted its history of spills and footprints every time I entered. The kitchen felt fresher, calmer, like a room that finally exhaled.
There’s a kind of intimate satisfaction in working close to the ground, brush in hand, watching each inch brighten under your fingers. You begin to notice details you usually rush past: the coolness of the tiles under your knees, the way the afternoon sun angles across the floor and makes the clean lines look almost new again.
Keeping It Spotless Without Losing Your Weekend
The good news is that once you’ve done the deep clean, you don’t need to repeat the whole ritual every week. Grout maintenance turns out to be less about getting dramatic with cleaning products and more about the little, almost invisible habits you build into daily life.
The “Barely-There” Routine That Works
Here’s how to keep your grout from slipping back into its old, dark habits without dedicating your Saturday to scrubbing:
- Quick daily sweep or vacuum. Dust and grit are the first layer of grime. Removing them early keeps them from getting worked deeper into the grout.
- Use a mild floor cleaner. Skip the heavy chemicals for regular mopping. A gentle, pH-neutral cleaner keeps both tiles and grout happier over time.
- Wipe spills fast. Coffee, juice, sauces—these are grout’s favorite stains. Catch them while they’re fresh and they rarely leave a mark.
- Light touch-ups. Once a month, pick a small area and give it a quick pass with the baking soda paste. You don’t have to tackle the whole floor at once.
- Consider sealing. If your grout is unsealed and you want extra protection, a grout sealer—applied once or twice a year—can help repel stains and make that next clean-up much easier.
You don’t have to be perfectly consistent. Life gets busy. Some months you’ll manage a light scrub; others you’ll just sweep and call it a day. The point isn’t perfection—it’s direction. As long as you’re mostly moving toward cleaner grout, instead of letting grime quietly win, you’re doing enough.
When the Grout Fights Back
There are, of course, floors with a past so dramatic that no single cleaning session can rewrite it. Maybe the grout is decades old, or perhaps a previous tenant thought mopping with leftover dishwater was a valid cleaning strategy. If your lines stay dark after one pass, don’t assume the method failed. Sometimes, grout needs a second or third slow, steady nudge out of its habits.
I had a patch near the back door that resisted everything. After two rounds of paste and scrubbing, it was better, but not quite where I wanted it. That’s when the neighbor with the sunshine house suggested, “Try giving those stubborn bits an overnight soak with the paste. Just a thicker layer, then scrub in the morning.”
It felt slightly ridiculous frosting the floor before bed, but it worked. The longer contact time gave the mix a chance to seep deeper. By morning, a gentle brush loosened stains that hadn’t budged the day before.
There’s something almost symbolic in that: even the most stubborn corners of our houses, like the most stubborn corners of our lives, sometimes just need time—and a bit of patience—to let go of what they’ve been holding.
Listening to Your Floor
Not every floor will want exactly the same thing. Some tiles are glossy and delicate, others rough and stone-like. Some grout lines are thick and sandy, others thin and smooth. Try your paste in a small, hidden area first. Watch how the tile responds. Does it stay glossy? Does the grout color look more honest, less shadowed?
Paying attention in these little ways is its own quiet pleasure. You start to know your home a bit better: which spots collect dust first, where footprints always appear, which corner seems to catch the morning light in a particularly kind way when the floor is clean.
Goodbye to Blackened Grout, Hello to a Quieter Kind of Clean
In the end, saying goodbye to blackened grout wasn’t about discovering a miracle product. It was about finding something simple, safe, and gentle enough that I’d actually use it more than once a year. Baking soda, dish soap, warm water, a touch of hydrogen peroxide if needed—it’s not glamorous, but it’s deeply human-scale. It smells familiar, feels manageable, and doesn’t demand you suit up like you’re entering a hazard zone.
The real win isn’t just the lighter grout lines; it’s the shift in how your home feels. You walk barefoot across the tiles and don’t catch that mental flinch at the dark seams anymore. You kneel to pick something up and notice the soft, honest brightness of the floor instead of the tired map of every spill you’ve ever ignored.
One ordinary afternoon, after I finished a slow, half-hour touch-up of the kitchen, I made tea and stood leaning against the counter. The kettle hissed softly; the light was low and warm. The grout lines, once harsh and shadowed, now sat quietly in the background, doing their job without calling attention to themselves. It struck me then: so much of making a place feel like home lives in these nearly invisible details—the ones that don’t shout, but softly, steadily, let you breathe easier.
So if you’ve been avoiding looking too closely at your tiled floor because of those dark lines, here’s your permission slip to handle it the gentle way. No vinegar, no bleach, no burning eyes. Just a simple, quick hack and a little bit of time. You may discover that what you’re really cleaning isn’t just grout—it’s the way you move through your home, with a little more ease and a lot less silent irritation from the floor beneath your feet.
FAQ
How often should I deep-clean my grout with this method?
For an average household, a full grout deep-clean every 3–4 months is usually enough. High-traffic areas like the kitchen or hallway might benefit from a light touch-up every 4–6 weeks.
Is hydrogen peroxide safe for all grout colors?
Hydrogen peroxide is generally safe for light-colored grout, but for dark or colored grout, always test a small hidden area first to make sure it doesn’t lighten the color.
Can I use this method on bathroom tiles too?
Yes. It works well on bathroom floor and wall grout. For areas with soap scum or mild mildew, the paste can help break down buildup without harsh fumes.
Will this damage my tiles?
Baking soda is a mild abrasive, so it’s usually safe on ceramic and porcelain tiles. Avoid scrubbing delicate, highly polished, or soft stone tiles too vigorously. Always patch-test if you’re unsure.
What if my grout still looks dirty after cleaning?
Very old or deeply stained grout may need multiple cleaning sessions. If, after a few rounds, it still looks dark, it might be permanently stained or worn—and regrouting or recoloring may be the next step.
Do I need to seal grout after cleaning?
You don’t have to, but sealing clean, dry grout can help repel future stains and make cleaning easier. Consider sealing high-traffic areas once or twice a year.
Can I premix and store the paste?
It’s best to mix it fresh. Over time, the texture changes and the paste can dry out. Since it uses such simple ingredients, it’s quick to whip up just before each cleaning session.