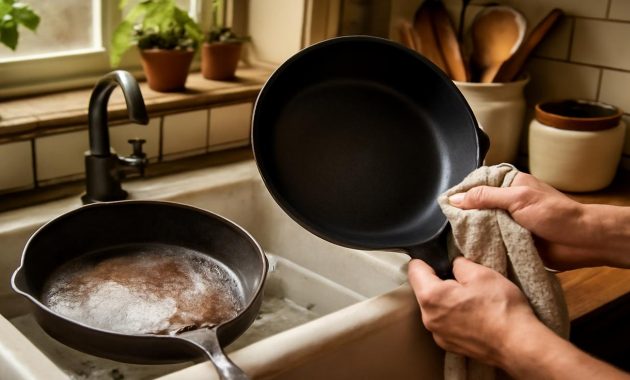
The pan arrived in a cardboard box that smelled faintly of engine oil and old basements. It had been my grandmother’s, someone said, unearthed from the back of a cousin’s garage, wrapped in a disintegrating grocery bag. When I peeled the plastic away, the cast iron surface was the color of dried blood and ash—orange rust, black crust, and a roughness that caught at my fingertips. It looked less like a cooking tool and more like a relic dragged from a shipwreck.
“You’ll never save that,” a friend told me, eyeing the jagged surface. “You’ll have to grind it down. Or just buy a new one.”
I almost agreed. We’re used to quick fixes and buying replacements, not slow resurrections. But that pan carried stories: Sunday cornbread, skillet-fried chicken, the hiss of onions hitting hot iron. I wanted it back, not a shiny modern substitute. So I started reading, asking old-timers, combing through forgotten corners of forums and fading pamphlets—and that’s when I stumbled on a method described in a quiet, matter-of-fact way.
“We just soaked ’em,” one retired camp cook wrote. “Let the water and time do the work. Then you start over.”
It sounded too simple. Almost suspiciously gentle. But the more I dug, the more I realized this soaking approach—part chemistry, part patience—was once routine. Now, in the age of instant restoration videos and power tools, it’s been quietly pushed aside. Yet it still works, and what it gives back is more than just a rehabilitated pan. It gives back that deep, velvety black surface with a minimum of scraping and swearing—and a different kind of satisfaction entirely.
The Quiet Science of Letting a Pan Soak
Most of us have been taught one ironclad rule about cast iron: never soak it. Water, we’re told, is the fast train to rust, and letting a pan sit in a sink full of suds might as well be signing its death certificate. There is truth in that—if we’re talking about a perfectly seasoned, well-loved skillet.
But when a pan is already far gone—crusted in burnt-on buildup, patchy with active rust—the rules change. The forgotten soaking method leans into what we usually fear: prolonged contact with water. Done intentionally and correctly, it becomes a powerful reset button.
At its core, this method is simple: you submerge the pan in a controlled soaking solution, let the old grime and flaky rust loosen over hours or days, gently remove what’s released, and then rebuild the seasoning from bare or nearly bare metal. Instead of carving the pan clean with power tools, you let time and chemistry soften what time and neglect created.
Imagine slipping the pan into a quiet bath instead of attacking it with an angle grinder. The kitchen is quieter. There’s no screech of metal on metal, no clouds of rust dust. You’re not wrestling with it; you’re watching it slowly give up its scars.
Why Soaking Works Better Than Scraping Alone
Old seasoning that has turned sticky, uneven, or carbon-thick is basically polymerized oil and burnt food welded to iron. Dry scraping leaves you sweating over the sink, chipping away in small victories. Soaking softens those bonds. Water, especially when mixed with a small amount of a mild agent like dish soap or a basic solution, creeps under layers that seemed immovable, swelling and loosening them.
Rust, too, responds to immersion. While heavy soaking in plain water can encourage more rust, a targeted solution (and a controlled timeframe) can help lift existing rust so that it wipes or brushes away with a fraction of the effort. This is not a half-hour fix; it’s a slow dissolve, the gradual unthreading of years of misuse and neglect.
The Forgotten Soak: How the Old-Timers Did It
Talk to people who learned to cook outdoors—camp cooks, scout leaders, folks who’ve run church camp kitchens—and you’ll hear versions of a similar story. When the pans got too far gone, nobody grabbed a sander. They drew a big wash tub, filled it with warm water, added a bit of mild helper, and left the iron to soak.
Then they waited.
In cabins and bunkhouse kitchens, cast iron would sit submerged, often overnight or longer. The next day, someone would reach into the cloudy water, lift out a pan that felt strangely lighter, and go at it with a stiff brush or a scraper. What had clung so stubbornly now sloughed off like a winter coat in spring. More soaking, more scrubbing, and finally, the skillet would be rinsed, dried, and rushed back over heat to be reborn with new oil.
Their version of soaking wasn’t fussy. No specialized gadgets, no complicated chemistry—just an understanding that water and time could handle most of the hard work. Today’s restoration techniques, like lye baths or electrolysis, are powerful and precise. But the classic soak is low-tech, low-barrier, and surprisingly gentle if you respect its steps.
The Basic Soaking Approach, Step by Step
Everyone refines the method to their liking, but the heart of it tends to look like this:
- Strip away any loose debris first. Knock off flakes with a wooden or plastic scraper. You’re not trying to clean it yet, just remove the obvious loose bits.
- Prepare a soaking container. A deep sink, plastic bin, or bucket big enough to submerge the pan fully. Line it with a towel if you’re worried about noise or scratches.
- Mix a gentle soaking solution. Warm water with a few drops of mild dish soap works for many pans. For heavier carbon buildup, some people add a small amount of a basic cleaner designed for kitchen degreasing, always diluted heavily.
- Submerge and wait. Lower the pan in and walk away. For light buildup, a few hours may do. For serious neglect, 12–24 hours—or even repeating soaks over several days—can be transformative.
- Scrub—and listen to the sound. Lift the pan out, scrub with a stiff brush, chain mail scrubber, or non-metal scouring pad. The sound changes as the surface smooths, from a rough grind to a softer hiss.
- Repeat only as needed. If stubborn spots remain, back into the bath it goes. You’re letting the soak, not your arms, carry the burden.
- Dry completely and quickly. Once the old layers are gone or mostly gone, rinse well, then dry immediately—towel first, then low heat on the stove to chase off any hidden moisture.
- Re-season from a clean slate. Now it’s time to build that deep, black surface again with thin layers of oil and heat.
It may sound laborious on paper, but in lived time it’s mostly waiting. You’re not hovering over the sink; you’re just visiting the pan now and then, helping it shed what it no longer needs.
From Rough Orange to Deep Black: Rebuilding the Seasoning
After the soak and scrub cycles, there’s a moment that feels almost unsettling. You look down and see bare or nearly bare iron—gray, matte, vulnerable. No warm gloss, no nostalgic patina. Just the skeletal core of what will become a new pan.
This is where a lot of people rush the process. They’ve done the work of stripping, and now they want instant perfection: one thick coat of oil, one hot blast in the oven, and a magical factory finish. But cast iron seasoning is less like painting a wall and more like growing a forest—layer after thin layer, built up with heat and time.
To move from rough orange or gray to that deep black finish, the trick is restraint.
- Use a neutral or high-smoke-point oil (like grapeseed, canola, or refined sunflower) in a truly thin layer—so thin that you can’t see wet shine, only a faint sheen.
- Wipe the oil on with a lint-free cloth or paper towel, then wipe it back off again until you wonder if any is left.
- Heat the pan upside down in a hot oven, letting the oil polymerize rather than pool.
- Cool, then repeat, building multiple whisper-thin coats rather than one heavy, sticky one.
Eventually, the color deepens. First a faint amber, then a mottled brown-black, then, after repeated use and more subtle layers, that familiar, velvet-black that catches light like a raven’s wing. The soaking method doesn’t shortcut the seasoning process, but it does give you a cleaner canvas, free of old mistakes baked in for decades.
A Practical Comparison: Effort vs Results
Not everyone has a workshop, a car battery charger for electrolysis, or a dedicated lye tank. But almost everyone has access to warm water, a bin, and time. Here’s how the soaking method stacks up against other common restoration approaches when you’re trying to get that smooth, deep black finish back with minimal effort:
| Method | Effort Level | Tools Needed | Risk to Pan | Best For |
|---|---|---|---|---|
| Soaking + Gentle Scrub | Low (time-intensive, not labor-intensive) | Bin/sink, mild soap, brush | Low if dried and re-seasoned promptly | Most home restorations; heavy buildup, moderate rust |
| Aggressive Scraping/Sanding | High physical effort | Scrapers, sandpaper, power tools | Medium–High (possible gouges, uneven surface) | Severe pitting or when speed is more important than finesse |
| Lye Bath | Moderate (careful setup and safety) | Lye, non-reactive container, safety gear | Low–Medium (if handled properly) | Thick, stubborn seasoning and baked-on grease |
| Electrolysis | Moderate technical setup | Battery charger, washing soda, sacrificial steel | Low (very effective, but needs know-how) | Severe rust; collectors and enthusiasts |
For many home kitchens, soaking sits in the sweet spot: minimal tools, low risk, and no need to turn your restoration into a science project. And because you’re lifting off old layers gently, you preserve the pan’s original casting details, those soft curves and smooth surfaces that make old iron such a pleasure to cook on.
Listening to the Pan: Texture, Sound, and Scent
One of the unexpected gifts of the soaking method is that it slows you down long enough to actually get to know the pan. In a world where so many things are rushed, disposable, or replaced, there’s something quietly grounding about checking on a soaking skillet and reading its progress with your senses.
Run your fingertips across the rim after the first soak: you’ll feel the difference between glassy old polymer and the emerging grain of iron. As more layers loosen and lift, the pan’s surface will start to feel more uniform—less like a landscape of bumps and scabs, more like a stone worn smooth by a river.
The sound changes, too. Early scrubbing has a harsh, gritty chatter. But each round of soaking and brushing softens it. Eventually, the brush skims and whispers over the metal, a sign that you’re nearing the end.
Even the smell is a clue. At first, after lifting the pan from its bath, there’s the stale scent of old oil and damp storage. But as you rinse and dry it, as you lay down the first clean layer of seasoning, the scent shifts. Warm iron, faintly nutty oil, and that elusive, homey smell when the pan heats empty for the first time—a prelude to every meal yet to come.
Living With a Reborn Pan
Once your pan has completed its slow transformation—from rusted relic to smooth, black, ready-for-supper companion—its future is decided less by what you did during restoration and more by what you do next, every day.
Regular cooking is now your seasoning partner. A bit of oil, gentle heat, food that doesn’t cling so fiercely as to scar the surface. Avoiding harsh detergents and yes, from here on out, avoiding long soaks in standing water. This isn’t the emergency bath anymore; this is the everyday care that keeps your work intact.
The first few meals you cook after a deep restoration can feel ceremonial. A fried egg that slides instead of sticks. Potatoes that crisp at the edges in a shimmering halo of oil. Cornbread that emerges with a golden crust and steams when it hits the cutting board. There’s a quiet thrill in knowing that this pan, once written off as junk, is now performing as well—or better—than something brand-new.
And slowly, without fanfare, it will deepen further. That deep black finish, born from your patient soaking and careful re-seasoning, will evolve into something softer, glossier, more complex, like the patina on a well-loved table or the shine on a pair of boots that have walked a long way with you.
Why This Old Method Matters Now
It might sound like this is just about a single pan, or a handful of old skillets rescued from flea markets and family attics. But the forgotten soaking method is a small, practical rebellion against the idea that everything must be instant, optimized, or replaced.
It asks almost nothing fancy of you—no special machines, no rare chemicals. Just a willingness to let water and time soften what’s hardened, to accept that some of the best transformations happen slowly, under the surface, while you’re busy doing something else.
There’s a quiet joy in pulling a once-ruined cast iron pan from a soaking tub, feeling its surface reborn under your hands. You’re not just cleaning metal; you’re bridging eras. You’re taking part in a very old conversation between human and tool, one where care is paid back in meals and memories.
Somewhere down the line, another set of hands may inherit your pan. They might wonder how it survived so long, how it stayed so smooth, so deeply black, still ready to sear and simmer after decades of use. You may never get to tell them, but you’ll know: part of the magic came from doing less, not more. From letting it rest in water, listening to the slow work of restoration, and trusting an old, nearly forgotten method to bring it gently back to life.
Frequently Asked Questions
Isn’t soaking cast iron in water bad for it?
Soaking an everyday, well-seasoned pan in water for long periods can encourage rust, which is why it’s usually discouraged. But when you’re restoring a heavily rusted or crusted pan, a controlled soak is part of the reset process. The key is to dry and re-season the pan immediately after you’re done soaking and scrubbing.
How long can I safely soak a cast iron pan?
For most pans, 4–12 hours is a good starting range. Severely neglected pans may benefit from multiple 12–24 hour soaks, with scrubbing between each. Avoid leaving the pan forgotten for days at a time, and always check progress periodically.
What should I put in the soaking water?
Warm water with a small amount of mild dish soap is often enough. For stubborn, thick carbon buildup, some people use a diluted kitchen degreaser or a basic solution, always in low concentration. Avoid harsh acidic soaks for long periods, as they can etch the iron.
Will soaking remove all of the old seasoning?
It will loosen and often remove most or all of the compromised, uneven, or sticky layers. Extremely tough spots may still require some gentle scraping or repeated soaks. The goal is to reach a consistent surface so that new seasoning can bond evenly.
How do I know when to stop soaking and start seasoning?
Stop when the surface feels mostly smooth and uniform under your fingertips, with no thick, raised patches of old buildup. A bit of light staining or very thin residual patina is fine; it’s heavy, flaky, or gummy areas that indicate you need more soaking or scrubbing.
What’s the best oil to use when re-seasoning after soaking?
Neutral, high-smoke-point oils like grapeseed, canola, or refined sunflower oil work well. The crucial part is not the specific oil, but applying it in extremely thin layers and heating the pan hot enough for the oil to polymerize without pooling or staying sticky.
Can I use this method on enameled cast iron?
No. Enameled cast iron has a glass-like coating that should not be stripped or aggressively restored in this way. The soaking method described here is for bare cast iron only. Enameled pieces need gentler cleaning focused on the enamel surface, not on rebuilding seasoning.