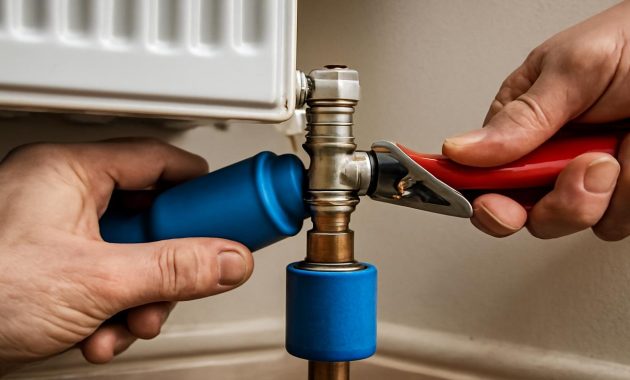
The radiator was hissing again, a faint, restless sound that only made itself known in the quiet of the evening. Outside, the streetlights glowed against the damp pavement, and the sort of bone-deep cold that makes you want to burrow under blankets had settled across the neighborhood. Inside, though, there was warmth—almost. One radiator in the hallway sat stubbornly lukewarm, its old valve stuck in a halfway mood between on and off. You tap it with a knuckle, listen to the dull, tired clink, and feel that tug of curiosity and determination: maybe this time, instead of calling someone, you’ll fix it yourself.
Listening to the Heartbeat of Your Heating System
If you’ve lived with radiators for long enough, you start to recognize their moods. There’s the happy ticking of pipes warming up, the deep, contented hum of a system working well, and sometimes a grumpy rattle where something isn’t quite right. A faulty radiator valve is one of the simplest, most common little villains in this story: the radiator that never gets hot, or never cools down; the room that feels like a fridge while the next is a sauna.
What stops a lot of people from dealing with it themselves is one intimidating phrase: “You’ll have to drain the system.” It conjures images of buckets, chaos, rusty water running everywhere, half a day spent crouched beside pipework, and a sinking suspicion you’ve started something you can’t finish.
The comforting truth is that you can usually change a radiator valve without draining the whole heating system. It’s a careful, deliberate job—like performing a tiny surgery on the veins of your house—but with the right preparation, patience, and a few tools, it’s entirely within reach for a practical-minded person.
Before any spanners touch any pipes, though, there’s an important mindset to adopt: respect for hot water, pressure, and old plumbing. That doesn’t mean fear; it means moving slowly, thinking ahead, and accepting that the goal isn’t just to “get it done,” but to leave the system safe, sealed, and quietly efficient when you’re finished.
Gathering Your Tools Like Trail Gear Before a Hike
Imagine you’re heading out for a long winter walk. You’d never step onto the trail without checking your boots, packing a warm layer, maybe slipping a thermos into your bag. Tackling a radiator valve is no different: your “trail gear” lives in a toolbox.
You don’t need anything particularly exotic, but the tools you choose will shape how calm and tidy the job feels. Here’s a simple at-a-glance checklist to keep handy:
| Item | Purpose |
|---|---|
| Adjustable spanner (or two) | Loosening and tightening valve and pipe nuts |
| Radiator bleed key | Releasing air and relieving pressure |
| Small bucket or tray | Catching water when you break the seal |
| Old towels / rags | Protecting the floor and mopping spills |
| PTFE tape (plumber’s tape) | Ensuring a watertight seal on new joints |
| New radiator valve (matching type and size) | The replacement part itself |
| Flathead screwdriver (optional) | For some lockshield caps or unusual fittings |
The star of the show, of course, is your new valve. This is where a little observation pays off. Most radiators have two valves: one you use regularly (often a wheel-head or a thermostatic radiator valve, called a TRV), and a quieter partner on the other side called the lockshield valve. The thermostatic one listens to the room temperature; the lockshield quietly controls how much water flows through, balancing the system.
Stand in front of the radiator and really look at what’s there now. Is the valve angled out at 90 degrees (an “angled” valve) or rising straight up (“straight” valve)? Does the pipe come up from the floor or along the wall? Matching that shape matters more than you might think—choosing the wrong style can turn a neat little swap into a wrestling match with rigid pipes.
There’s something satisfying, almost ceremonial, about laying out your tools and the gleaming new valve on a towel before you start. It tells your brain: this is happening, and it’s happening on your terms.
Shutting Down the Heat and Calming the Water
Every good project begins with taking the energy out of the system. In this case, that means heat and water pressure. Before you so much as twitch a nut on that radiator, you want the heating off—properly off.
Head to your boiler or central heating controller and switch the heating off completely. If your system is old or you’re not entirely sure what’s what, also turn the boiler power off at the mains. Then wait. Give it at least half an hour, longer if the system has been working hard. The goal is simple but non‑negotiable: you do not want hot, pressurized water greeting you when you open anything.
Now kneel beside the radiator you’re working on and find those two valves. The easy one is the hand-operated control or TRV. Turn it fully clockwise to the off position, usually until it stops or reaches the frost symbol. On the other end, the lockshield may have a little protective plastic cap. Gently lever that off if needed, revealing a small square or slotted stem underneath. Using a spanner or screwdriver, turn that stem clockwise until it stops as well. With both radiator valves closed, you aren’t shutting down the whole system—you’re simply isolating this one radiator from the rest of the house.
There’s still water inside the radiator body and a short length of pipe on each end, like small reservoirs caught between your closed valves and the rest of the network. You’ll manage that water directly, rather than draining it all away from the lowest point in the building.
This is where the bleed key comes in. At the top of the radiator, usually on one end, there’s a small square-headed screw in a round plug: the bleed valve. Place your tray or bucket under the valve you’ll be working on later, then gently crack open the bleed screw with your key, just enough to hear a whisper of air—or a dribble of water—escape. This releases trapped pressure and will let air in later, helping the water inside drain out under control instead of fighting against a vacuum.
Loosening, Catching, and Keeping Calm
This is the moment people imagine going horribly wrong: the wrench slips, a jet of rusty water arcs across the floor, and everything dissolves into frantic mopping. In reality, if you move methodically, what happens is less dramatic and more like tipping out a slow cup of tea—messy only if you rush.
Spread old towels around the base of the radiator. Slide your tray or bucket as close as possible under the valve you’re going to change. On most modern setups, the connection you’ll undo is the nut that joins the valve body to the radiator tail—the short threaded piece screwed into the radiator itself.
Place one adjustable spanner on the flat surfaces of the valve body to hold it still. With the other spanner, grip the nut right next to the radiator and gently turn it anticlockwise. It might resist at first, a little gritty from years of warmth and dust, but it will begin to turn. As it loosens, water will start to seep, then trickle, out of the gap. This is where your earlier bleeding pays off; the pressure is gentle, not explosive.
Let the water run into the tray. You can slightly reopen the bleed valve at the top of the radiator to help the flow along, allowing air in as water comes out. Listen to the sounds: the soft gurgle into the tray, the tiny hiss of air, the occasional hollow clunk from somewhere deeper in the system. It’s the plumbing equivalent of the house taking a deep, controlled breath.
Once the flow slows to an occasional drip, you can fully undo the nut at the radiator end of the valve. For some valves, there will also be a compression joint on the pipe side—a similar-looking nut clamping onto a brass ring called an olive. You may not need to disturb this side if you’re replacing like for like, but if the new valve demands it, loosen that nut as well, all while keeping your bucket snug against the joint.
The old valve will eventually slip free, heavy with the memory of years of service and a little pool of dark water inside. Tip that water into the tray and set the valve aside. The radiator, for a brief and slightly vulnerable moment, is open to the room through its exposed tail.
Fitting the New Valve: A Small Act of Craft
There’s a quiet pleasure in this part: the new valve in your hand, threads clean and bright, the reassuring weight of solid metal. Before you install it, consider the connection surfaces. If the radiator tail is old, corroded, or mismatched with the new valve, it’s often wise to replace it as well. Radiator tails usually unscrew from the radiator body with a large hex key or special tool, but if they’re solid and the new valve is specifically designed as a drop-in replacement, you may keep the existing one.
Wherever you have a threaded joint—typically the tail that screws into the radiator—wrap the threads with PTFE tape. Hold the tail firmly and wind the tape around in the same direction as you’ll tighten the joint (usually clockwise as you look at the thread end). Six to ten neat wraps are usually enough, layered without bunching. Press it lightly into the grooves with your fingers; it should look like a thin, even scarf rather than a thick bandage.
Offer up the new valve to the radiator tail, aligning it so the outlet meets the pipe without strain. Start each nut by hand to avoid cross-threading. The pipe should slip into the valve’s compression fitting, with the olive (new or existing) sitting snugly in its recess. Once everything is loosely assembled and sitting naturally, return to your spanners.
First, gently tighten the nut between the valve and the radiator, holding the valve body steady so you don’t twist the tail. Then move to the compression nut hugging the pipe. Tighten until you feel firm resistance—compression fittings seal by squeezing the olive against the pipe and valve body, not by brute force alone. Overtightening can damage the olive or even crush softer pipework; you’re aiming for confident, not aggressive.
At this stage, the valve is physically in place, but the system is still, in its own way, holding its breath. Both valves on the radiator remain closed, the bleed screw cracked open just enough to remind you there’s still air at the top and water down below waiting to be invited back.
Waking the System and Chasing Tiny Leaks
Now comes the moment of truth, and it’s as much about observation as action. Start by closing the bleed valve at the top of the radiator. Then, very slowly, turn the lockshield valve (the one you don’t normally touch) anti‑clockwise, just a little. You want to let water creep into the radiator, not rush. Listen for the gentle filling sound: a trickle, a swirl, the occasional hollow plink as water meets metal.
Keep your towel and tray in place under the new valve and watch. Look closely where metal meets metal: the joint at the radiator nut, the compression nut on the pipe, even the body of the valve itself. For a few moments, you’re not doing anything except looking and waiting. A well-sealed joint will stay quiet and dry. A joint that needs a bit more persuasion will begin with the tiniest bead of water fattening on the thread.
If you see moisture, nudge the offending nut a little tighter—just a quarter turn at a time—then wipe the area dry and observe again. There’s something meditative about this loop of adjustment and checking. You’re teaching the system where it needs to seal, where the pressure should stay inside, invisible, doing its work.
Once the lockshield is open and the joints remain dry, turn your attention to the main control valve or TRV on the other end and slowly open that too. Air that’s still inside the radiator will rise to the top, so after a short while, visit the bleed valve again. Place a cloth beneath, then crack it open until air escapes with a soft hiss, followed by a steady weep of water. When water runs without sputtering, close the bleed valve firmly.
Now restore power to the boiler and set the heating to run. As the system warms, metals expand slightly, pressures settle, and any marginal joints will often reveal themselves only under those conditions. Stay nearby for the first full heat cycle, checking your new valve a couple of times as warmth moves through it. It’s like watching a newly planted tree in the first wind—most of the time, it stands just fine, but you’re there to make sure.
When to Pause and Call a Professional
There’s quiet heroism in doing this work yourself, but wisdom, too, in knowing your limits. If you discover that your system is sealed and highly pressurized with no obvious isolation, or if the valves near your boiler look ancient and reluctant, it may be safer to let someone with more experience take over. Likewise, if at any point water begins to pour out far faster than you can contain it, the best move is often to close what you can, shut down the boiler, find the main water stop tap, and make a call.
But for many homes, especially with reasonably modern pipework and accessible valves, changing a radiator valve without draining the whole system is less like wrestling with a beast and more like learning a new, careful craft. You’re not just swapping metal parts; you’re learning to read the plumbing’s language—the subtle signs of pressure, the hint of a misaligned olive, the difference between a harmless weep and a real leak.
The Quiet Satisfaction of a Warm, Even Room
Later, when the evening comes back and the cold presses against the windows once more, you pass the hallway radiator and lay a hand on it almost without thinking. It’s warm now, evenly so, a smooth gradient of heat climbing from the bottom to the top. The new valve sits there, unassuming, its job entirely ordinary and completely essential.
There’s a specific kind of satisfaction in this moment: not just that the room is warmer, but that it’s warmer because you decided to understand a small, hidden part of your home and then shaped it with your own hands. You didn’t drain the whole system, you didn’t turn the house upside down; you isolated, observed, replaced, sealed, and tested.
Radiators and valves might seem like dull engineering compared with wind-swayed trees or migrating birds, but they’re part of the ecosystem of your everyday life. They breathe warmth into winter mornings, keep pipes from freezing, and make rooms feel human. Learning how to care for them—how to change a single valve without dragging the entire heating system into drama—is its own kind of quiet, domestic nature story.
Next time you hear that faint hiss, feel that stubbornly cool panel on a cold day, you’ll know that what lives beneath the paint and metal isn’t a mystery; it’s a system you’ve met before. One valve at a time, you’re learning its rhythms.
FAQ
Do I really not need to drain the whole heating system?
In many cases, no. As long as you can close both valves on the individual radiator, you can isolate it and only manage the water in that section. You’ll still release some water, but not from every radiator and pipe in the house.
Is this safe for a sealed (pressurized) system?
It can be, if you fully turn the heating off, let everything cool, and carefully isolate the radiator. However, sealed systems can carry higher pressures, so if you’re unsure about isolation valves or how to relieve pressure, it’s wise to get professional advice.
How do I know which replacement valve to buy?
Match the style (angled or straight), the pipe size (often 15mm in many homes), and the connection type to your existing valve. Taking a clear photo or the old valve to a plumbing store helps staff point you to a compatible replacement.
What if my new valve still leaks after tightening?
First, try gently tightening the leaking joint a little more and wiping it dry to confirm if the leak stops. If it persists, you may need to redo that joint, using fresh PTFE tape on threaded connections or a new olive on compression joints.
Do I need to rebalance the heating after changing a valve?
If you replaced a lockshield valve or disturbed its setting significantly, you may need to rebalance. That means adjusting lockshields on various radiators so they all heat up at similar rates, usually by partially closing some to prevent the nearest radiators from stealing all the flow.
Why is the radiator cold at the top after I’ve finished?
That usually means air is trapped. Open the bleed valve with a key until air stops hissing and a steady stream of water appears, then close it. Check the system pressure at the boiler afterwards and top up if needed.
Can I do this with a towel radiator or only regular ones?
You can usually change valves on towel radiators too, as long as they have isolating valves on both sides. The process is similar: isolate, relieve pressure, swap the valve, then refill and bleed carefully.