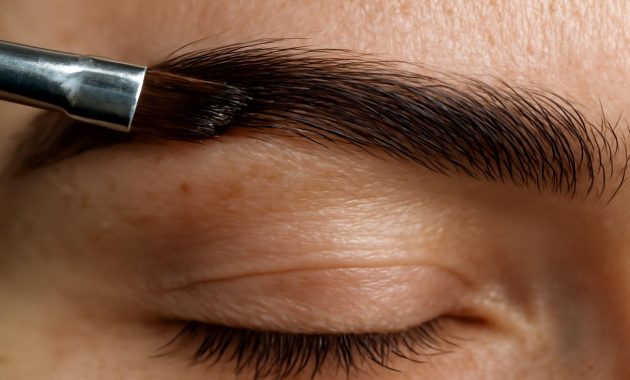
The first time you notice your bare brows in the bathroom mirror, it’s probably not a grand epiphany. More like a quiet, suspicious squint. The rest of your face looks awake. Your skin has a hint of color, your lashes curl up willingly, but your brows—those tiny, fuzzy architects of expression—seem to have stepped out for a smoke break. Sparse at the tails, faded at the arch, washed out along the edges. You lean closer, tilt your head, and there it is: the unmistakable thought that maybe, just maybe, a little tint could turn these ghostly wisps into something soft, defined, and unmistakably yours.
The Quiet Magic of Soft, Natural Brows
There’s something almost poetic about a brow that looks like it simply grew that way—no harsh lines, no blocky fronts, no shiny gel screaming for attention. Just a gentle shadow of color that makes your eyes look brighter, your face more balanced, your expression more you.
In recent years, brows have been through phases as dramatic as seasonal fashion trends. We’ve seen the ultra-carved Instagram brow, the over-plucked nineties revival, the laminated look that makes each hair stand at attention like tiny soldiers. But somewhere between all the extremes, people have been quietly craving something simpler: brows that look effortless, believable, and low maintenance. Brows you don’t have to babysit every single morning.
That’s where at-home tinting, done softly and thoughtfully, slips in like a secret shortcut. No salon appointment, no waiting room, no stinging guilt when you hand over your card. Just you, a small kit on the bathroom counter, and a method that turns a nervous experiment into a gentle ritual.
Preparing Your Canvas: Brows, Skin, and a Little Bit of Courage
Before any color touches your brows, there’s a small, grounding ceremony that happens: you prepare. It sounds simple, but this step is what separates “Oh no, what have I done?” from “Oh, that looks kind of perfect.”
First, you wash your face, not with the half-hearted splash reserved for rushed mornings, but with a bit more intention. Warm water, a gentle cleanser, maybe the faint scent of citrus or chamomile lifting with the steam. Dry your face fully—especially around the brows. Any oil, leftover makeup, or residue will make the tint glide or cling in odd ways.
Then, you step closer to the mirror and really see your brows. Where do they start? Where do they trail off? Are there tiny blond hairs at the edges that almost disappear into your skin? These nearly invisible strands are where tinting quietly shines, turning “barely there” into “naturally full.”
If your skin is sensitive, you draw a whisper-thin line of barrier: a bit of petroleum jelly or thick moisturizer around, not on, the brows. Just enough to keep the dye from staining where it shouldn’t. You feel a small bloom of control in doing this—like outlining your own borders before letting in color.
Patch testing the tint itself might not feel glamorous, but it’s non-negotiable. A dot of mixed color behind the ear or on the inner arm, left for the recommended time, rinsed away, then forgotten about for 24 hours. The world won’t change in that time, but your peace of mind will. No itching, no redness, no drama? You’re ready.
The Soft Tinting Method: A Calm, Easy Approach
When you finally crack open the tint kit, don’t think of it as a chemistry experiment. Think of it more like brewing tea. You’re not forcing a transformation; you’re coaxing it out gently.
Most at-home kits include two parts: a color cream or gel, and a developer. On a small mixing tray, you blend them into a smooth, creamy paste, watching the tint darken slightly as the components wake up together. It may not look like much, but this is where your brows begin to shift from suggestion to statement.
Here’s where the “soft, defined, and natural” part really depends on you: timing and application pressure. Using a slim angled brush or the tiny applicator from the kit, you start where your brows are densest—the middle—not the front. This keeps the color from getting too strong at the inner corners, where heavy tint can make your expression look stern or drawn.
You gently press, not drag, the tint into the hairs, following their natural direction, like brushing dew along blades of grass. Small strokes, light touch. You follow the curve of your arch and nudge the tint outward toward the tail, where the hairs grow finer and sparser. This is where tint feels like magic: you see those nearly invisible baby hairs suddenly claim their space, turning a whisper of a tail into something graceful and complete.
Leave the very front of the brows—the inner few millimeters—for last. With a nearly empty brush, you softly feather color upward through those starting hairs, tapping more than painting. You want a soft shadow there, not a block of color.
Here’s one of the easiest ways to keep things natural: tint in layers. Instead of committing to the full recommended time in one go, you:
1. Apply the tint.
2. Wait for half the suggested time.
3. Wipe it away gently.
4. Check the mirror in good, natural light if possible.
5. If you want deeper color, reapply for a shorter second round.
This layered approach gives you more control, especially if you’re new to tinting or working with a darker shade than usual. You’re building a soft watercolor wash, not painting a wall.
Finding Your Shade and Intensity: Where Subtlety Lives
One of the quiet truths about eyebrow tinting is this: the perfect shade usually looks boring in the tube. Not jet-black, not dramatically rich, but something muted and slightly dull. On your brows, though, that muted tone wakes up, mingling with your natural hair color and skin warmth.
If your hair is very light—blonde or light brown—shades labeled “light brown” or “taupe” usually give the most natural result. Dark brunettes and black hair rarely need pure black tint; a deep brown often looks softer, less severe, and more dimensional. Redheads might find harmony in warm browns with a subtle golden or copper undertone, but not full-on auburn, which can veer into theatrical territory.
A simple way to think about it: your brow tint should usually be one or two shades darker than your hair if your hair is light, or one shade softer if your hair is very dark. The goal is not to match perfectly, but to echo, like a harmony note instead of a unison.
Here’s a quick visual guide you can keep in mind while choosing shades and intensity:
| Your Hair Color | Suggested Brow Tint Shade | Result Look |
|---|---|---|
| Very light blonde / grey | Light taupe or light ash brown | Soft, understated definition |
| Dark blonde / light brown | Soft medium brown | Natural, everyday fullness |
| Medium–dark brown | Medium–dark neutral brown | Defined but still soft |
| Black or very dark brown | Dark brown (not pure black) | Refined, less harsh structure |
| Red / copper / strawberry blonde | Warm light–medium brown | Harmonious, softly warm brows |
This isn’t a rigid rulebook, more like a compass. And remember: if you’re unsure, choose the lighter shade. You can always deepen with a second application, but lightening an over-dark brow at home is a far less poetic experience.
The Gentle Ritual: Cleaning Off and Seeing the Reveal
When your timer wraps up—whether that’s the full time or your cautious first layer—it’s time to rinse. This is the moment where impatience whispers, but gentleness wins.
You take a damp cotton pad or soft cloth, press it lightly onto the brow, and sweep with the direction of hair growth. No frantic scrubbing, just patient swipes. Frequently folding the pad or rinsing it keeps you from smearing leftover tint onto the surrounding skin.
The first glimpse might look darker than you hoped—that’s normal. Wet brows always seem more intense. Give them a few minutes to dry, and step back from the mirror. Literally. Not nose-to-glass, but an arm’s length away, the distance at which other people actually see your face.
This is usually when the tension softens into relief. Your brows look…finished, but not heavy. The tails that once faded away now trace a smooth, natural line. Sparse patches blur into a soft shadow. Your eyes look framed, your features gently anchored. It’s not a “look” in the theatrical sense. It’s more like turning up the contrast on your own face by a few quiet degrees.
If, in the end, they still feel a touch too strong, you have options. A gentle cleanse with your regular face wash can soften the stain slightly. Within a day or two—after showers, skin care, and the small frictions of daily life—the tint settles into its true, subtler self.
Keeping Brows Soft, Defined, and Low Maintenance
Once your brows are tinted, something delightful happens to your routine: it shrinks. The morning scramble is suddenly lighter. You no longer stand at the mirror nudging powder into empty spaces or coaxing a pencil into a convincing arch. A quick brush-through with a clean spoolie, maybe a light clear gel if you’re feeling fancy, and they’re done.
Tint typically lingers for a couple of weeks on the hair, sometimes longer if your brows are thick and your skincare is gentle. On the skin beneath the brow hairs, it fades faster—usually in a few days. If you’re aiming for a consistently soft, defined look, repeating the tinting ritual every 3–4 weeks tends to keep everything balanced without feeling like a chore.
You can help the tint last with a few small habits:
- Avoid scrubbing directly over the brows when cleansing.
- Keep strong exfoliants and facial peels away from the brow area.
- Pat, don’t rub, when drying your face.
Over time, you’ll notice your comfort and precision improve. The first session might feel tentative, measured, almost clinical. By the third or fourth, it becomes more like trimming a plant you know well—you understand its shape, its needs, and how gently you can push its edges.
Common Mistakes (and How to Gently Avoid Them)
Even the calmest at-home tint session can wander into tricky territory. But nearly every “brow disaster” has a quiet, manageable fix.
- Going too dark on the first try: Choose a lighter shade or halve the recommended processing time. You can always build up in short increments.
- Tinting sharp, squared-off fronts: Leave the inner brow for last and use a nearly clean brush to feather on minimal product.
- Staining the skin beyond the brow shape: Apply a thin barrier cream around the brows and clean up edges quickly with a damp cotton bud while the tint is still fresh.
- Skipping patch tests: Even if a product has worked for you in the past, your skin can change. That tiny test is a tiny investment in safety.
- Trying to “fix” brows with shape instead of color: Tinting can’t correct an over-plucked or uneven shape; it simply enhances what’s already there. Let hair regrow where possible, then support it with gentle tint.
The beauty of this process is its reversibility. Brows grow. Tint fades. Mistakes soften. With each session, you settle more into a rhythm that matches both your face and your comfort zone.
A Small Ritual with a Quietly Big Impact
There’s something deeply satisfying about reclaiming small pieces of your routine from the outside world. The salon chair has its place, but so does the simple act of standing in your own bathroom, hand steady, breathing slow, watching your reflection shift in subtle, self-guided ways.
Soft, naturally defined brows don’t shout for attention. They don’t photograph as dramatically as a bold lip or a glittered lid. But they change your relationship with your own face in a tender, almost invisible way. On days when you wear no other makeup, your brows whisper, “I’m awake. I’m here.” On days when you go full glam, they anchor the look without demanding center stage.
At-home eyebrow tinting, done gently, is less about perfection and more about ease. It’s about waking up and recognizing yourself a little faster. It’s about stepping out the door with one less thing demanding your time. And, maybe, it’s about the quiet pleasure of realizing you can create this softness on your own—no appointment required.
FAQ: At-Home Eyebrow Tinting for Soft, Natural Brows
How long does at-home brow tint usually last?
On the brow hairs, tint usually lasts 2–4 weeks, depending on your hair type, how often you wash your face, and whether you use strong exfoliants or peels near your brows. On the skin beneath the hairs, any stain typically fades within a few days.
Is at-home eyebrow tinting safe?
Most brow tints designed for at-home use are safe when you follow the instructions and patch test 24 hours before application. Never use regular hair dye on your brows, and avoid contact with your eyes. If you notice burning, itching, or strong irritation, rinse immediately and discontinue use.
Can I tint my brows if they are very sparse or over-plucked?
Yes, but the result will be softer. Tint can darken fine, light hairs you already have, making brows appear fuller. It can’t create hair where none exists, so extremely sparse areas may still benefit from a bit of pencil or powder after tinting.
What if my brows turn out too dark?
First, don’t panic. Gently wash the brow area with a mild cleanser and warm water to soften the color. Within a day or two, normal cleansing and skincare usually mellow overly dark tint. For future sessions, choose a lighter shade and reduce the processing time.
How often can I safely tint my brows?
Most people do well tinting every 3–4 weeks. This gives the hairs time to grow and shed naturally while keeping the color fresh. Tinting more frequently is usually unnecessary and may increase the risk of irritation.
Can I still use brow makeup after tinting?
Absolutely. Tinting simply gives you a fuller, more even base. On days when you want extra definition—perhaps for an evening out—you can add powder or pencil and clear gel on top of the tint. Many people find they just use less product overall.
Should I tint my brows before or after other beauty treatments?
It’s usually best to tint brows after waxing, threading, or shaping (allowing any redness to calm first) and before heavy skincare treatments like peels or strong exfoliants. This order helps your skin stay calmer and your tint last longer.