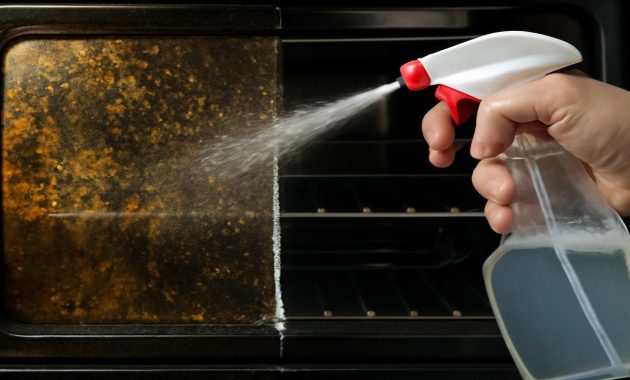
The smell hits you first—burnt cheese, caramelized grease, that vaguely smoky note that tells you something overflowed weeks ago and has since baked itself into the very soul of your oven. You catch it when you preheat for a frozen pizza, when you slide in a tray of vegetables, when you open the door to check cookies and a small cloud of charred memory drifts out. You promise yourself you’ll deal with it “this weekend,” and then you close the door and move on.
The Afternoon I Finally Faced the Oven
It was a gray Saturday, the kind of afternoon that begs for slow-roasted vegetables and a homemade pie. I opened my oven, already imagining cinnamon and rosemary, and instead met a stained, streaked interior that looked like it had seen several minor explosions and at least one cheese-related disaster.
The glass door was mottled with foggy brown patches. The racks wore a coat of blackened, baked-on grease that had survived countless meals, holidays, and “it’ll have to do” dinners. The bottom panel was a map of old spills: a ring where a casserole bubbled over; a jagged streak of something sugary that had turned into obsidian; a constellation of tiny black specks that could once, optimistically, have been breadcrumbs.
I did what almost everyone does. I Googled. Lemon. Baking soda. Vinegar. A baking soda paste left overnight. Steam-clean cycles. The usual choir of natural-cleaning classics. The problem was, I’d tried them all before. They worked… eventually. But “eventually” in this case meant forty-five minutes of scrubbing, three changes of cleaning cloths, a sore shoulder, and the faint feeling that life is too short to polish oven racks like family silver.
That day, something in me rebelled. There had to be a way to get this oven clean without feeling like I’d signed up for a gym membership I never wanted.
The Two Ingredients Hiding in Plain Sight
I wasn’t looking for magic. I was looking for “good enough without destroying my arms.” But instead, I stumbled into something unexpectedly close to magic—two ingredients that hardly ever star in cleaning conversations. Not lemon. Not baking soda.
They were in my kitchen already, almost smug in their ordinariness:
- Dishwasher tablets (yes, the little bricks or pods you toss into your dishwasher)
- Plain shaving foam (the classic white kind, not gel, not scented with a forest of colognes)
They don’t sound glamorous. They don’t smell like a citrus grove. No influencer is pouring them into glass spray bottles on a marble countertop with a vase of eucalyptus in the background. But once you see what they do to an oven that’s seen some things—well, you might give them a permanent spot in your cleaning rotation.
Before we dive into how to use them, it’s worth pausing to picture what you’re actually up against when you clean an oven. That shine you want? It’s hidden under layers of carbonized fats, caramelized sugars, and microscopic food particles that have been heated and re-heated until they’ve fused with the surface. Heat doesn’t just cook your food; it bakes your mess into a new, tougher form of itself.
Most of the scrubbing you think you need to do isn’t actually about force—it’s about chemistry. The right ingredients soften and lift that baked-on layer so your sponge isn’t battling a hardened shell all by itself. That’s where the odd little duo of dishwasher tablets and shaving foam step in.
Why Dishwasher Tablets Work Like Tiny Grease-Busting Bricks
Here’s the first unexpected hero: the humble dishwasher tablet. Designed to break down stubborn baked-on food from glass and metal at high temperatures, these tablets are basically concentrated degreasing power pressed into a small, solid form.
They’re built to:
- Cut through fats and oils
- Break apart protein-based stains (think cheese, meat juices, baked-on sauces)
- Rinse clean without leaving residue
All of that translates beautifully to the inside of an oven—especially the glass door and metal racks—where most of your grime is exactly that: fused fats and cooked-on sauces.
How to Use Dishwasher Tablets on Your Oven (Without a Workout)
You don’t use them the way you’d use them in your dishwasher. No machine. No water jets. Just your hands, a bowl of warm water, and a little patience—far less than you’d normally spend scrubbing.
- Choose the right tablet. Go for the plain, no-frills kind if you can. If yours have a water-soluble wrapper, remove it. Avoid super-strong perfumes if possible.
- Pour a small bowl of warm water. Not boiling, just comfortably warm. You want it to soften the tablet slightly.
- Dip, don’t soak. Lightly dip a corner of the tablet into the warm water for a second or two. It should feel slightly softened on the outside but still firm enough to hold in your hand.
- Use it like an eraser. Press the dampened tablet directly onto the glass oven door or a metal area with baked-on grime. Glide it back and forth. You’ll feel the texture change—from gritty resistance to buttery smooth as the grease lifts away.
- Wipe with a damp cloth. As the tablet leaves a thin, cloudy film, use a soft cloth or sponge dipped in clean water to wipe it away. You’ll see clear streaks of clean glass appear underneath.
- Repeat as needed. For very stubborn spots, you can pause, re-dip the tablet, and give it a second pass. But it’s more like scribbling with chalk than grinding with sandpaper.
What’s surprising isn’t just that it works—it’s how little effort it takes. That feeling of leaning your full body weight into an old sponge, trying to chip away a blackened patch on the oven floor? It goes away. The tablet disintegrates slowly as it works, like a bar of soap that erases burn marks instead of cleaning hands.
This method works particularly well on:
- Oven glass doors (inside and outside)
- Metal oven racks
- The metal base of the oven, as long as it’s not enamel that scratches easily
Always test a small, inconspicuous area first if you’re unsure about your oven’s finish. Most modern ovens handle it just fine, but it pays to be cautious.
The Soft Power of Shaving Foam
The second ingredient sounds like a prank at first. Shaving foam? In the oven? But once you understand what’s inside that airy white puff, it makes a strange sort of sense.
Classic, old-school shaving foam is built to:
- Soften and lift oils from skin
- Break the surface tension of water so it glides smoothly
- Create a cushioned layer between blade and skin
Translate that to a dirty oven interior, and you get this: a thick, clingy foam that grips to vertical surfaces, stays put over time, and gently loosens grease so you don’t have to.
How to Turn Shaving Foam into an Oven-Cleaning Mask
Think of this process like a spa treatment for your oven. Minimal effort for you, lots of quiet work happening while you do other things.
- Pick the right foam. You want plain, white, traditional shaving foam—not colored gel, not heavily perfumed formulas, and not aftershave creams. The more basic, the better.
- Start with a cool oven. Completely cool. Do not apply shaving foam to a warm or hot oven.
- Spray a generous layer. Cover the interior walls, the bottom panel, and any heavily greased corners with a thick layer of foam. You don’t need perfection—just enough to coat the grime.
- Let it rest. This is the secret: time instead of muscle. Leave the foam for at least 1–3 hours. For ovens that have seen serious action, you can even leave it overnight.
- Wipe it away. Use a damp cloth or sponge to wipe off the foam. You’ll notice that the once-stubborn grease and brown patches smear and slide away with startling ease.
- Rinse well. Go over the surfaces with a clean, damp cloth several times to remove any residue. You don’t want leftover foam baking into your next meal.
The delight of this method is in its quietness. While the foam sits and does its work, you’re free. No leaning into the oven. No painful elbows brushing against metal edges. No harsh chemical smell clawing at your throat.
This approach works best on:
- The oven’s interior metal walls
- The oven floor (avoiding heating elements)
- The back panel around the fan, where grease tends to settle
Again, test a small patch first, especially if your oven has any unusual coatings. Most people find that shaving foam leaves metal surfaces clean, smooth, and noticeably brighter.
Combining the Two for a Near-Scrubless Deep Clean
Each ingredient is impressive on its own. Together, they make a kind of two-stage ritual that turns “cleaning the oven” from a dreaded saga into a short, oddly satisfying project.
Here’s a simple flow that makes the most of both:
- Remove the racks. Take them out and set them aside.
- Use shaving foam inside the oven. Coat the interior—walls, floor, and back panel—and let it sit while you deal with the racks and door.
- Work on the racks with a dishwasher tablet. Either:
- Lay the racks in the bathtub on an old towel, run a few inches of warm water, and rub them with a softened tablet, or
- Place them on a large towel on the kitchen floor and use a dipped tablet directly.
- Clean the glass door with a dishwasher tablet. Dip and “erase” the brown fog until the glass turns clear again.
- Return to the shaving foam. After your chosen resting time, wipe down the interior. Use a microfiber cloth and a bowl of warm water, rinsing as needed.
- Final rinse. Once everything’s clean, give the oven interior and racks one last pass with a damp cloth to remove any remaining residue.
- Dry and reassemble. Let everything air-dry with the door open for a bit, then slide the racks back in and close the door on a transformed oven.
What surprises most people is the amount of time your hands actually spend working. It’s not nothing—but it’s closer to fifteen or twenty minutes of real effort, scattered between long pauses where the ingredients are quietly softening grime on their own.
A Quick Comparison of Methods
| Method | Effort Level | Best For | Time Needed |
|---|---|---|---|
| Baking soda paste | Medium–High (lots of scrubbing) | Light–moderate dirt | Several hours plus scrubbing |
| Commercial oven cleaner | Low–Medium (less scrubbing, stronger fumes) | Heavy, long-term buildup | 30–90 minutes, plus ventilation |
| Dishwasher tablet | Low (targeted rubbing) | Glass doors, racks, tough spots | 20–40 minutes total |
| Shaving foam | Very low (mostly waiting) | Interior walls, general grime | 1–8 hours resting, minimal wiping |
Making It a Ritual, Not a Chore
There’s a quiet satisfaction in sliding open a clean oven door. The glass gleams. The racks catch the light. When you turn on the heat, there’s no residual whiff of “last month’s lasagna.” Instead, your kitchen smells like what you’re cooking now, not what you cooked before.
Once you’ve done this deep clean with your unlikely duo, maintenance becomes much simpler. A few small habits, layered into your routine, keep the grime from ever getting that intimidating again:
- After a big roast or cheesy dish, let the oven cool slightly, then quickly wipe obvious spills with a damp cloth.
- Once a month, run a shaving foam “mini session” on just the bottom panel or the areas that catch the most drips.
- Every couple of months, take five minutes with a dishwasher tablet to refresh the glass door before it ever gets fully opaque again.
Done this way, the oven ceases to be a guilty secret lurking behind a metal door and becomes another cared-for tool in your kitchen—a place you’re not embarrassed to open when a guest asks, “Mind if I pop this in for a second?”
There’s also something deeply grounding about turning to simple, familiar items and discovering they can do more than you expected. The dishwasher tablet that usually works unseen, the shaving foam that’s part of someone’s quiet morning routine—suddenly they’re partners in reclaiming a neglected corner of your home.
Listening to Your Own Kitchen
Ovens carry stories. The dark stains on the bottom aren’t just dirt; they’re evidence of birthday cakes that overflowed, gratins that bubbled too enthusiastically, hurried dinners that saved the day. Cleaning your oven isn’t about erasing those stories—it’s about making room for new ones, without the lingering scent of the old.
As you kneel by the open door, tablet in hand, or watch the shaving foam slowly soften the past off your oven walls, you might feel something shift. The task becomes less about punishment for procrastination and more about tending to the tools that feed you and the people you love.
You don’t need industrial-strength chemicals or a full afternoon of elbow grease. Sometimes, it just takes looking twice at the simplest things already living in your cabinet, waiting quietly to surprise you.
FAQ
Is it safe to use dishwasher tablets inside my oven?
Used correctly, dishwasher tablets are generally safe on glass and most metal oven surfaces. Always test a small, inconspicuous area first, avoid using them on delicate enamel finishes that scratch easily, and rinse thoroughly with clean water afterward.
Can I use any type of shaving foam?
Stick to plain, classic white shaving foam. Avoid gels that transform into foam, heavily perfumed formulas, or products with extra oils or moisturizers. The simpler the ingredient list, the better for cleaning.
Will my oven smell like shaving cream after cleaning?
There may be a faint scent at first, but thorough rinsing with a damp cloth usually removes it. If you’re concerned, run the oven empty at a moderate temperature for 10–15 minutes after cleaning to burn off any trace residue.
Do I need to wear gloves when cleaning with these ingredients?
Gloves are optional but recommended, especially if you have sensitive skin. Both dishwasher tablets and shaving foam can be mildly drying, and gloves make the whole process more comfortable.
How often should I deep-clean my oven this way?
For most home kitchens, a deep clean every 2–3 months works well, with quick wipe-downs after especially messy meals. If you cook or bake heavily, you might prefer a monthly refresh using the shaving foam and occasional touch-ups with a dishwasher tablet on the glass and racks.