The pan was already too hot when I dropped the chicken breast in. I knew it the second the oil hissed like an angry cat and a cloud of acrid smoke curled toward the ceiling. By the time I flipped the chicken, the outside was nearly mahogany, the inside still worryingly soft and translucent. I sliced it open anyway, hoping for a miracle. Instead, I got the familiar twin disasters of home-cooked chicken: half dry, half raw. I stared at the ruined dinner and did what any reasonable person would do in that moment—I ordered takeout and vowed, once again, to “figure out chicken breasts someday.”
The night a chef quietly solved my chicken problem
“You’re fighting the meat,” the chef told me, watching me manhandle a pile of pale chicken breasts in the corner of a small cooking class I’d signed up for on a whim. He was one of those unassuming professionals—soft-spoken, with sleeves rolled neatly above his elbows, the calm of someone who’d seared more protein than I’d had hot dinners.
I’d just confessed my problem: I could roast a decent vegetable, coax flavor from beans, even bake sourdough, but chicken breasts? Every time, they betrayed me. Dry. Stringy. Chewy. Or worse: cooked on the outside, suspiciously glossy in the middle. I followed recipes. I used timers. I bought a nicer pan. Still, disaster.
He took a single chicken breast from my cutting board and held it up like a visual aid. “This,” he said, “is a shape problem.”
Laid flat on the board, the truth was obvious: the chicken breast was a lopsided wedge. One end thick and domed, the other tapering to a thin little tail. “This will never cook evenly as it is,” he explained. “So you fix the shape before you ever touch the pan.”
He smiled at my confusion, rinsed his hands, and showed me the trick I now use every single time—a trick so simple I’m still a little annoyed no one taught it to me sooner.
The chef trick: flatten first, then cook
The secret I’d been missing isn’t a special marinade or a fancy piece of equipment. It’s this: you gently even out the thickness of the chicken breast before you cook it. Not pounding it into a thin cutlet, not slicing it open like a book, but shaping it so it cooks at the same speed from edge to center.
“Think of it like leveling a cake before frosting,” the chef said, handing me a small rolling pin. “You’re not destroying it. You’re preparing it.”
Here’s the simple version you can do in any kitchen, on any weeknight:
- Place the chicken breast on a cutting board and cover it with a piece of parchment paper or plastic wrap.
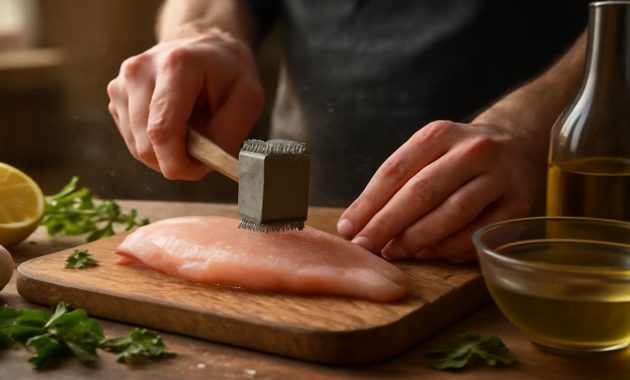
- Starting from the thicker end, gently tap it with a rolling pin, small pan, or meat mallet—just enough to bring the thick part closer in line with the thin part.
- Rotate it once or twice, keeping an eye on the shape. Stop when the breast feels even from end to end—around 1.5 to 2 cm thick for quick cooking.
That’s it. Not dramatic, not violent, no wild hammering. Just a quiet little recalibration. In a minute or two, that lopsided wedge becomes a smooth, even cut of meat that actually wants to cook properly.
Standing there in the warm glow of the cooking school lights, I tried it myself. The resistance under the rolling pin softened; the muscle fibers subtly shifted. When I lifted the parchment, the chicken breast looked almost…civilized. Smoother. More obedient. I seasoned it, laid it in the pan, and for the first time ever, the sizzle felt like a promise instead of a threat.
What “perfect” chicken breast actually feels like
You know that moment when you cut into a piece of chicken and hold your breath, waiting to see whether it’s going to betray you? That first slice becomes a truth-teller. The knife glides or it drags. The juice stays or it runs. The meat shreds or it yields.
The night of that class, when I cut into my newly flattened, gently seared chicken, the knife slipped through like it was moving through warm butter, not dry rope. No stringy pull. No chalky center. Just a soft, moist slice that held together but didn’t resist.
As I lifted a piece to my mouth, I noticed something else: the aroma was different. Not just “chicken,” but that richer, almost nutty scent of properly browned proteins—the Maillard reaction doing its magic because, now that the piece was evenly thick, it spent less time in the pan drying out while the center tried to catch up.
The first bite was tender all the way through, no gray band of overcooked meat around the edges. Salt, pepper, a hint of garlic—I hadn’t done anything special with flavor. The transformation came almost entirely from that one quiet step at the cutting board.
“People blame themselves for bad chicken,” the chef said, watching us taste our own handiwork. “But most of the time, it’s just physics. Uneven thickness means uneven cooking. Fix the thickness, and suddenly you’re a better cook than you were ten minutes ago.”
From that moment on, I stopped seeing chicken breasts as fickle enemies and started treating them like slightly stubborn but ultimately cooperative ingredients—ones that just need a little pre-game adjustment to shine.
The simple blueprint: how I cook chicken breasts now
These days, whenever I pull a pack of chicken breasts from the fridge, I don’t feel anxious. I feel almost smug. Because I know that if I follow the same simple pattern, I will end up with juicy, flavorful chicken every time, no matter what sauce or spice I use.
Here’s the home-cook version of the method I’ve settled into, the one that’s easy enough for weeknights, flexible enough for whatever you have in the pantry:
Step 1: Pat dry and flatten
- Pat the chicken dry with a paper towel so it can brown properly.
- Place it under parchment or plastic wrap.
- Gently tap the thickest parts until the breast is an even thickness throughout.
Step 2: Season with intention
- Season both sides with salt first—it’s the foundation of flavor.
- Add pepper, herbs, spices, or a light rub. Even just paprika and garlic powder can make it feel deliberate.
- If you have 15–30 minutes, let it sit. The salt starts to work its way in, subtly improving texture.
Step 3: Use medium heat, not maximum drama
- Heat a skillet over medium to medium-high. Add a thin layer of oil.
- When the oil shimmers (not smokes), lay the chicken in gently, away from you.
- Don’t move it for a few minutes—let a light golden crust form.
Step 4: Flip once, finish gently
- Flip when the underside is golden and releases easily.
- Cook the second side until the internal temperature reaches about 70–72°C (160–162°F).
- Take it off the heat and let it rest for a few minutes—the temperature will rise slightly to the safe zone, and the juices will redistribute.
To make this easier to visualize, here’s a compact reference you can mentally carry into the kitchen:
| Step | What You Do | Why It Matters |
|---|---|---|
| Flatten | Even out thickness with gentle tapping | Prevents dry edges and raw centers |
| Season | Salt, pepper, spices or herbs | Builds flavor inside and out |
| Sear | Medium heat, don’t move too soon | Creates color and flavor without burning |
| Finish | Cook to 70–72°C, then rest | Keeps it juicy and tender |
Variations: the same trick, endless dinners
Once the flatten-first method became second nature, I realized something: this one small habit quietly unlocks dozens of easy meals. Because once your chicken cooks evenly and reliably, you can stop worrying about the meat itself and start playing with everything around it.
Some nights, I keep it bare and bright. I’ll flatten and sear the chicken with just salt, pepper, and a squeeze of lemon at the end. Paired with a pile of greens and a spoonful of whatever grain is leftover in the fridge, it’s suddenly a clean, comforting dinner that feels like it came from a café instead of my cluttered kitchen.
Other nights, I lean into cozy. I’ll flatten, season with smoked paprika and thyme, sear the chicken, then quickly build a pan sauce in the same skillet—garlic, a splash of stock or white wine, a spoon of mustard, maybe a swirl of cream. The chicken slips back in, bathing in the sauce for the last minute or two like it belongs there.
The beauty is that the method doesn’t care about the flavor profile. Italian herbs, citrus and cumin, soy and ginger, honey and chili—it all rides on the same quiet foundation: even thickness, controlled heat.
And because it cooks faster this way, I’m suddenly more likely to use chicken breasts on nights when I’m tired and close to ordering delivery. Knowing that I can get from “out of the fridge” to “on the plate” without overcooked sadness has changed how often I actually cook.
Why this trick works even if you’re “bad at cooking”
There’s something almost forgiving about this method. You don’t have to slice with restaurant precision or wield a fancy thermometer (though a cheap one helps). Flattening buys you margin for error. Because the chicken cooks more evenly, those extra 60–90 seconds you might overshoot don’t instantly turn the whole thing into sawdust.
It also gives you a kind of quiet confidence. Instead of fussing and flipping and poking, you learn to trust the process: flatten, season, sear, finish, rest. A rhythm. A small ritual that fits itself into your weeknight chaos and makes you look more skilled than you feel.
And every time you cut into a perfectly cooked chicken breast and realize it’s not a fluke, not luck, but something you deliberately did—there’s a little rush in that. You’re no longer at the mercy of a vague “medium-high heat” instruction in a recipe. You’re in control of the shape, and so you’re in control of the result.
The sensory rhythm of cooking chicken well
Now, when I cook chicken breasts, I pay attention to the sensory cues more than the clock. The sound as it hits the pan—lively sizzle, not frantic crackle. The smell—that shift from raw chill to warm, savory promise. The way the edges turn opaque and pull ever so slightly from the pan when it’s ready to flip.
Flattening has slowed me down in the best way. It forces a tiny pause at the beginning, a moment of connection to the ingredient in my hands. I notice the texture of the meat under the parchment, the give of the thick end as it relaxes under those gentle taps. Cooking becomes less of a rush to the finish and more of a small conversation with heat and time.
It’s not dramatic. No big chef heroics. Just a series of small, sensory adjustments in your own kitchen: listening, smelling, watching. And somehow, that makes the finished plate taste better, too, because you were actually there for it, not just racing to feed yourself between emails and errands.
On evenings when the day has been chaotic and my mind is loud, this simple act—flatten, season, sear—feels almost like a reset button. The world narrows to the warmth of the stove, the rustle of parchment, the faint thud of the rolling pin. And at the end of that brief ritual, there is something undeniably grounding about sitting down to a plate of chicken that is exactly what you hoped it would be.
From ruined dinners to reliable comfort
I still remember that first ruined chicken breast that smoked up my kitchen and sent me scrambling for takeout menus. It felt, in the moment, like a small failure. Just another entry in the long list of things I should have mastered by now.
But standing in that cooking class, watching a quiet chef transform the problem from “I’m bad at chicken” to “this is just a shape issue,” something shifted. It wasn’t about talent. It was about a simple, practical adjustment. A trick that belongs as much in a cramped apartment kitchen as it does in a professional one.
Now, when I open a pack of chicken breasts, I don’t feel that old dread. I feel a low, steady kind of satisfaction. Because I know that with a piece of parchment, a few gentle taps, and a bit of attention, I can coax something tender, juicy, and deeply comforting out of that bland-looking cut of meat.
The trick is simple enough to explain in a sentence: Flatten your chicken breasts to an even thickness before you cook them, and they’ll stop betraying you. But lived out over countless weeknights, it becomes more than a technique. It’s a small, reliable kindness you offer yourself, one quiet dinner at a time.
FAQ
Do I need a meat mallet, or can I use something else?
You don’t need a meat mallet. A small rolling pin, the bottom of a sturdy saucepan, or even the flat side of a large spoon will work. The key is gentle, controlled tapping, not hard pounding.
How thin should I flatten the chicken breasts?
For most stovetop methods, aim for about 1.5–2 cm thickness, even from end to end. Thinner than that becomes more like a cutlet and cooks very quickly; thicker can still work, but you’ll need more time and gentler heat.
Will flattening make the chicken dry out faster?
No—if anything, it helps prevent dryness. Because the breast cooks evenly, you don’t have to overcook the thinner parts to make the thick center safe. That means less total time in the pan and more juiciness.
Can I use this method for baking chicken breasts in the oven?
Yes. Flattening first works beautifully for oven-baked chicken. Even pieces cook more consistently, and you’re less likely to end up with dry tips and an undercooked center. Just adjust your baking time based on thickness.
Is it still helpful if I brine or marinate the chicken?
Absolutely. Brining and marinating affect flavor and moisture, but they don’t fix uneven thickness. For the best results, flatten first, then brine or marinate. The flavors also distribute more evenly on a uniform piece of meat.