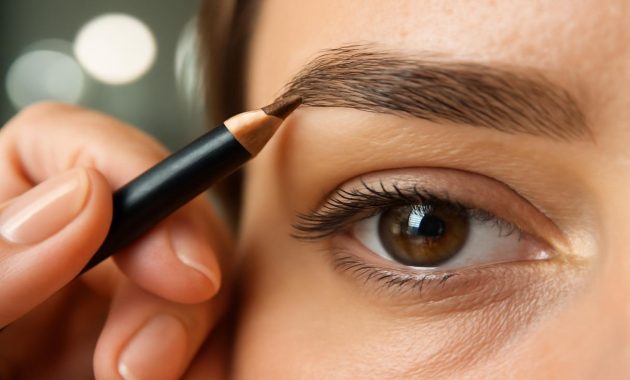
The first thing you notice is not the color. It’s the sound. A soft, papery scratch as the pencil kisses skin. You’re leaning toward the mirror, breath held, trying to sketch in the brows you wish you’d been born with. One wrong flick and you’re in cartoon territory; one timid stroke and they vanish the second you step outside. Somewhere between those extremes is the brow that looks like yours—only a little more deliberate, a little more defined, the kind that makes your whole face suddenly make sense. And that’s where the eyebrow pencil comes in, not as a blunt instrument of drama, but as a quiet, precise storyteller for the top half of your face.
Why Your Eyebrow Pencil Is More Than Just a Brow Tool
Ask any pro makeup artist and they’ll tell you: if foundation is the canvas, brows are the frame. A well-framed face doesn’t shout; it gently guides the eye. An eyebrow pencil, used correctly, can do things no other product can—it draws hair, not just shadow. It can restore what you overplucked in high school, balance asymmetry you never noticed until a video call, or add definition after hair loss or thinning.
But there’s another reason pros reach for pencils first: control. Powders are soft but can look flat. Gels hold, but they don’t build shape on bare skin. Pomades can be bold and demanding. A pencil, especially one with a fine tip, is like a sharpened graphite sketching tool in an artist’s hand—capable of the faintest whisper of a line or a deliberate, inky stroke.
Professional makeup artists often talk about brows the way nature writers talk about landscapes. Your brows are tiny ecosystems: no two are identical, each hair growing in its own direction, density changing from head (the inner part) to tail (the outer part). A pro doesn’t bulldoze that terrain; they work with it. The right pencil, in the right hands, respects what’s already there and quietly fills in the gaps.
Before you even twist up the tip, the pros suggest a moment of observation. Step toward a window. Let real daylight hit your face. Notice where your brows naturally start, where they peak, where they fade. See the color at the root, not at the ends burned by the sun or faded by time. This is the story you’re about to continue with your pencil—not overwrite entirely.
Choosing the Right Eyebrow Pencil: The Artist’s First Decision
Makeup artists rarely grab the first pencil in the kit. They’re thinking about three things: undertone, depth, and texture. They know that a brow that’s too dark can pull your whole face downward, and a brow that’s too warm can look strangely artificial, like a sepia filter sitting on top of your skin.
Color: It’s About Undertone, Not Just “Brown”
Pros start with undertone—cool, neutral, or warm—before they think about “light, medium, dark.” If your hair is ashy or cool, they’ll reach for a taupe or cool brown. If your hair has golden or red tones, they’ll choose something with a hint of warmth, but never orange. Black hair rarely needs a true black pencil; a deep, cool brown almost always looks softer and more believable.
One pro trick: match the pencil to the color of your brow hairs, not your scalp hair. If your brows are lighter than your hair, you can go half a shade deeper for definition, but never to the point where the brows arrive in the room before you do.
Texture and Tip: How “Soft” Should Your Pencil Be?
Shape and realism come down to texture. A firmer pencil with a fine tip lets you draw individual hairs and build slowly. A creamier pencil gives you bolder payoff but less precision—better for filling in sparse areas than for faking hair on bare skin.
Many artists keep both on hand. The firmer one is for the front and top edges of the brow, where strokes need to look like soft baby hairs. The creamier one is for the tail or the lower edge, where you might want a little extra density. If you’re choosing just one, go slightly firmer than you think you need; you can always layer, but you can’t un-smudge.
Quick Reference: Matching Pencil to Your Brows
| Natural Brow Color | Suggested Pencil Shade | Undertone Tip |
|---|---|---|
| Very fair / blonde | Light taupe or soft blonde | Stay neutral or slightly cool to avoid brassiness. |
| Dark blonde / light brown | Taupe or light brown | Neutral undertone works for most; go cooler if you’re very fair. |
| Medium brown | Medium ash brown | Slightly cool keeps brows looking natural, not reddish. |
| Dark brown | Deep cool brown | Avoid black; it can look harsh in everyday light. |
| Black / very deep | Soft black or espresso brown | Cool undertone keeps depth without going flat and inky. |
| Red / auburn | Warm brown, not true red | Think warm chestnut, not copper marker. |
Mapping Your Brows Like a Pro (Without Over-Engineering Your Face)
Before the pencil ever touches skin, most makeup artists do something that looks almost like surveying land. They’re not just guessing where your brows “should” be; they’re measuring balances your eye already expects to see. The trick is to use those guidelines, then soften them so your brows still look human, not drafted.
Stand in front of a mirror with your face relaxed. Take your pencil and use it as a straight edge:
- Place the pencil vertically from the side of your nostril straight up toward your brow. Where it crosses your brow line is roughly where the brow should begin.
- Angle the pencil from the side of your nostril through the center of your pupil. Where it hits your brow is where the highest part of your arch will feel most natural.
- Angle the pencil from your nostril to the outer corner of your eye. Where it meets your brow is where the tail should gently taper off.
These are not rules you’re required to obey. Nature rarely follows exact geometry, and forcing your brows into perfect angles can make your whole face look…uneasy. Instead, think of these as points on a map. If your brow starts slightly inside or outside, that’s not automatically wrong. What pros are really checking for is: do both brows start and end in roughly the same zones? Does one arch shoot up while the other barely rises? Are you over-elongating the tail so far that it pulls the eye downward?
The best time to do this mapping is in soft, diffused light—near a window, early or late in the day, when shadows are honest but kind. You’ll see the natural gaps and the way your hairs grow—upward at the front, sideways at the middle, slightly down toward the tail. That direction map matters, because your pencil strokes should follow it.
The Stroke-by-Stroke Technique: How Artists Actually Use the Pencil
Now comes the part that feels like drawing—because it is. Pro artists are not scribbling, not tracing one heavy outline and filling it in like a coloring book. They use a series of almost imperceptible lines, letting the brow slowly come into focus, the way a photograph appears in a darkroom tray.
Start Where You’re Sparse, Not at the Front
The instinct is to begin at the front of the brow, where you can see the biggest difference. Most pros do the opposite. They start where your brow is naturally densest—usually the middle—and where gaps are most obvious. This prevents the dreaded boxy front and heavy, squared-off inner corners.
Begin with a light hand in the center, pressing just enough to see color but not enough to leave harsh lines. Hold the pencil a bit farther back on the barrel; the closer you grip to the tip, the more pressure you tend to apply. Think of your strokes as soft, upward or diagonal flicks that mimic the direction and length of nearby hairs.
Mimic Hair, Don’t Color Skin
Every stroke should have a beginning and an end. Lay the tip down where a real hair would grow and flick in the same direction that hair actually moves. Short strokes are more believable than long lines. If you see a “stripe” instead of a suggestion of hair, it’s too long or too heavy.
Imagine you’re sketching a field of grasses rather than painting a wall. Each flick is a separate blade, some overlapping, some slightly curved. Leave tiny pockets of bare skin between them; that negative space is what keeps brows looking like they grew there.
Softening With a Spoolie: The Secret Eraser
The spoolie (that tiny mascara-wand brush often on the other end of your pencil) is not an afterthought. To pros, it’s a blending tool and a mistake-fixer. After two or three strokes, they’ll pause and brush gently through the brow, moving in the direction of hair growth. This does three things: it diffuses harsh lines, redistributes pigment so no single stroke looks obvious, and shows where more product is really needed.
If you accidentally drop a heavier line, don’t panic. Go in with the spoolie immediately and buff it through. If it’s still too strong, a cotton bud with a tiny bit of moisturizer or micellar water will lighten that area without erasing your whole brow. Then you can go back in with lighter, more respectful strokes.
Building the Arch and Tail Thoughtfully
When defining the arch, pros resist the urge to point it sharply. Instead, they lift the brow by subtly deepening the color right under the highest point, along the bottom edge, using tiny strokes. This adds structure without that surprised, perpetually questioning look.
The tail, meanwhile, should be the softest, lightest part of the brow, not a dagger. Use the tip of the pencil with almost no pressure, tapering the strokes so the color seems to fade rather than stop abruptly. A tail that ends too low can make eyes look tired; if you’re unsure, stop where your brow naturally thins and refine, rather than extend, that line.
Common Mistakes Pros Avoid (And How to Fix Them)
Makeup artists often say they spend more time undoing brows than doing them—especially on set, when someone shows up with brows that look fine in the bathroom but wild under studio lights. These are the pitfalls they see most—and the quiet adjustments they make.
Mistake 1: Starting Too Strong
Overdrawn inner corners are the visual equivalent of someone speaking too loudly in a quiet room. The front of the brow should be the softest part, with the most visible skin between hairs. If you’ve gone too heavy at the front, use your spoolie to brush upward and gently fade the color. You can even pinch a clean tissue around the hairs and wipe upward to remove excess.
Mistake 2: Using One Flat Color Everywhere
Natural brows are not monochrome. They’re slightly lighter at the front, deeper in the body, and sometimes cooler toward the tail. Pros mimic this by simply varying pressure: the lightest touch at the front, medium through the center, and just a bit more definition near the tail.
If you only own one pencil, pressure control becomes your built-in shading system. If you have two, some artists will use a lighter shade at the front and a slightly deeper one at the arch and tail, but always blending with the spoolie so there’s no visible transition line.
Mistake 3: Chasing Symmetry Too Hard
Brows are sisters, not twins—every artist repeats that like a mantra. One brow arches higher; the other might be slightly longer. Pro artists look for harmony, not identical copies. If one brow sits higher, they may lightly fill under the lower one and keep product off the top edge of the higher one, balancing without rebuilding your entire brow architecture.
If you stare too long, you’ll always find something to “fix.” The trick is to step back from the mirror, soften your gaze, and ask: does my face look balanced? Not: are my brows identical when zoomed to 200%?
Mistake 4: Ignoring the Rest of the Face
Pros never build brows in a vacuum. They consider your eyes, your lips, even your hairstyle. A bare face with ultra-defined brows can look disjointed; a smoky eye might ask for slightly stronger brow definition to avoid being overshadowed.
One artist’s ritual: after finishing the brows, they apply a little concealer, blush, or mascara, then circle back. Often, they’ll soften the brows slightly once they see them in the context of the whole face. You can do the same—think of brows as part of an ensemble, not a solo act.
Setting, Finishing, and Making Your Work Last All Day
Once the shape feels right, pros turn their attention to longevity. Brow pencils, especially creamier formulas, can soften or fade during the day, particularly on oilier skin or in humid weather. That’s where a nearly invisible final step comes in.
Many artists lightly press a clean finger or a tissue over the finished brows to absorb any excess oil or slip at the surface. Then, they set the hairs in place, often with a clear or lightly tinted brow gel, combing hairs upward at the front and slightly sideways along the arch and tail.
If you prefer to skip gel, you can still improve wear time. A pro hack: before applying pencil, dust a whisper of translucent powder through the brows with a tiny brush. This gives the pencil a drier, more stable surface to adhere to. After you’re done, you can tap the tiniest bit of powder along the edge of the brow (not all over) to blur any hard lines into the skin.
The aim is not a crunchy, immovable brow, but one that looks like it belongs in the real world—soft enough to move, defined enough to hold its story from morning meeting to late-night train ride.
Letting Your Brows Tell Your Story
Stand in front of your mirror again, pencil in hand. Maybe you remember the years you overplucked, or the first time someone filled your brows in a makeup chair and you barely recognized yourself. Maybe you see a gap from an old scar, or new sparseness that arrived quietly with age, hormones, or a chapter of illness.
Pro makeup artists talk about brows with an almost protective tenderness because they know how personal they are. An eyebrow pencil isn’t just a cosmetic tool; it’s a way of deciding how you want to be seen. Bolder today, softer tomorrow. More structured for a job interview, more undone for a walk in the park. You get to choose how much of that story you write in.
As you learn to use your pencil—not as a marker, but as a sketching tool—you may notice something subtle shift. You’ll start to see, not what you think your brows “should” look like, but what they already offer: a natural arch, a soft taper, a little wildness at the front that actually suits you. The pencil’s job is not to erase those things, but to support them—like adding a few more reeds at the edge of a marsh, so the whole landscape feels full and intentional.
In the quiet of your bathroom, pencil scraping softly, spoolie whispering through hairs, you’re doing something makeup artists do every day: paying attention. To direction, to light, to the tiny decisions that shape how the world reads your face. Used correctly, an eyebrow pencil doesn’t shout its presence. It disappears into the background, leaving only you—framed, defined, and unmistakably yourself.
FAQ
How hard should I press with an eyebrow pencil?
Lighter than you think. If you see a solid stripe on the first pass, you’re pressing too hard. The ideal pressure gives a faint line you can slowly build with multiple strokes and blend with a spoolie.
Should I sharpen my eyebrow pencil or keep it blunt?
For hair-like strokes, a fine, sharpened tip works best. If your pencil is very creamy, a slightly blunter tip can help avoid overly harsh lines. Many mechanical pencils have a built-in sharpener for reshaping the point.
Can I use an eyebrow pencil if I have very sparse or no brow hair?
Yes, but focus on ultra-fine, soft strokes that mimic hair, and work with a firmer, precise pencil. Mapping your brows carefully and using a spoolie or clean brush to diffuse edges will keep them looking natural on bare skin.
What’s the difference between an eyebrow pencil and brow powder?
Pencils draw individual hairs and offer more precision, making them ideal for shaping and filling gaps. Powders give a softer, shadowed effect and are better for gently thickening already full brows. Many pros layer both.
How do I stop my eyebrow pencil from smudging during the day?
Blot any oil from your brow area, dust a little translucent powder before applying the pencil, then set with a clear or tinted brow gel. Avoid touching or rubbing your brows throughout the day.
Can I use the same eyebrow pencil all year round?
Often yes, but if your hair or skin tone changes noticeably with the seasons—getting much lighter or darker—you might prefer a slightly different shade or undertone to keep your brows in harmony with the rest of your face.
How long should my brow tail be?
Ideally, the tail ends where a line from the side of your nostril to the outer corner of your eye meets your brow. Stopping slightly short of that point usually looks more lifted than extending past it.