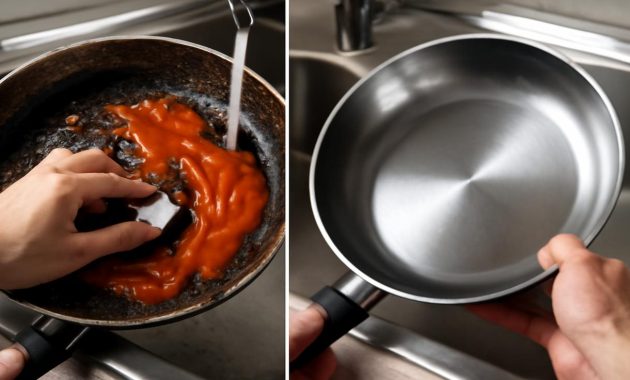
The smell hit first—sharp, bitter, unmistakably burnt. Then came the smoke, curling lazily from the pan like it had all the time in the world. You rush to turn off the stove, shove open a window, wave a dish towel around like you’re fanning a small emergency (because you are), and finally look down at the pan. Your heart sinks. What was supposed to be a golden, sizzling roast or a batch of crispy potatoes is now welded to the metal in a layer of blackened, stubborn crust. The sink is waiting. So is the dread. You already know what comes next: soaking, scrubbing, bargaining with the universe. You can practically hear the steel wool squeaking in protest and feel the ache building in your wrist. And then, like a reflex, the old voices in your head: “Try baking soda!” “Add vinegar!”
The Myth of the Miracle Pantry Duo
Baking soda and vinegar have become the celebrity couple of kitchen cleaning. They’re in every viral video, every “10 Genius Hacks” list, every friend’s enthusiastic text: “Just sprinkle and pour, it’ll fizz all the gunk away!” They have the theatrics down—the foam, the hiss, the satisfying sound of a tiny science experiment in your sink. But when it comes to that truly stubborn, burnt-on grease at the bottom of your favorite pan, the results often feel… underwhelming.
You stand there, watching the fizz die down, poking at the scorched layer with a spatula. It moves, barely. You add more. You scrub harder. At some point, you’re not even sure which you’re more mad at: the burnt grease or the broken promise of the hack that was supposed to save you.
The truth is, baking soda and vinegar aren’t a magical duo for every mess, especially not the deep, polymerized grease that has essentially transformed into a new material under high heat. The carbonized build-up, the glossy-black glaze of burned oil—this isn’t just surface-level dirt. It’s chemistry, bonded and hardened. And that means you need something designed to unravel that specific kind of mess.
Meet the Unsung Hero: The Magic Ingredient You Already Know
The magic ingredient isn’t exotic. It doesn’t fizz. It doesn’t need an infomercial. It quietly sits in your cupboard or on your grocery list every week. Not baking soda. Not vinegar. Something gentler, slicker, more strategic:
Dish soap. But not just a quick squirt and rinse—used in a very specific way: a hot, concentrated dish soap soak.
It sounds too simple to be magical, until you understand what’s happening in that pan while you’re off doing something else. The same surfactants that lift butter from plates and olive oil from glasses can, when given time and the right temperature, sneak between those burnt grease layers and the surface of your pan, loosening the bond quietly, invisibly, while you rest your wrists.
If baking soda and vinegar are the dramatic performers, dish soap is the quiet engineer—methodical, patient, incredibly efficient when you let it work the way it was made to.
The Science in the Soak
Most burnt-on grease is just fat molecules taken one step too far. Under high heat, oils oxidize and carbonize. They harden and cling to the tiny microscopic textures of your pan. Dish soap is full of surfactants, molecules with one end that loves water and one end that loves oil. When you soak your pan in hot water with a high concentration of dish soap, those molecules start to work like tiny crowbars, easing their way into the hardened layers of grease.
Hot water softens and swells the charred residue. The soap wedges itself into the loosened spaces, surrounding and breaking apart the greasy components. It’s not a showy reaction—no bubbles erupting like a volcano science fair project—just a slow, quiet dismantling. Give it time, and that impossible, rock-hard crust becomes something else entirely: soft, pliable, ready to be nudged off with almost embarrassing ease.
Where baking soda and vinegar can sometimes neutralize each other into a less effective, salty water solution, a strong dish soap solution stays laser-focused on its job. No fireworks, just results.
How to Use This Magic Ingredient Like a Pro
It’s one thing to know the ingredient, another thing to learn the ritual. This isn’t the quick “splash some soap and run the tap” move you pull with a lightly used bowl. This is a gentle ceremony, a small act of domestic alchemy that works best when you give it your intention—and a little patience.
Step-by-Step: The Hot Dish Soap Soak
Here’s a simple ritual you can follow the next time something goes from “beautifully browned” to “burnt beyond belief.”
- Cool the pan slightly, but not completely.
When you’re done cooking (or done rescuing what you can), let the pan cool until it’s safe to touch—but still warm. That warmth gives you a head start on softening the residues. - Add a generous squeeze of dish soap.
Not a dot, not a token swirl. A generous amount. Think of it as making a strong tea instead of weakly flavored water. You want the water to be saturated with surfactants. - Fill with very hot water.
Turn your tap to its hottest setting. If your tap doesn’t get very hot, you can boil a kettle and carefully pour boiling water into the pan along with the soap. Just make sure the pan is on a heat-safe surface, and never add cold water to a still-scorching hot metal pan—you don’t want warping. - Let it soak—really soak.
Leave the pan for at least 30 minutes. For very stubborn, old, or thick burnt grease, let it sit 1–2 hours or even overnight. This is the part where you do anything else: read, walk the dog, scroll, or simply enjoy not scrubbing. - Scrape gently with the right tool.
After soaking, pour off most of the water but leave a shallow layer at the bottom. Use a non-scratch scraper, a nylon spatula, or a gentle scrub brush. You’ll often find the burnt layer lifting in wide sheets, slipping away from the pan like old wallpaper coming off a steamed wall. - Repeat if needed for old battle scars.
For pans with years of accumulated burnt grease, you might need a second round. But each soak usually takes off another layer, revealing more of the metal beneath and less of the past mistakes.
In many cases, you’ll find that the part that felt like the “real work”—the scrubbing—is now just a light, almost satisfying polish. The true magic already happened in the quiet of the soak.
Why This Works Better Than Baking Soda and Vinegar
Baking soda and vinegar each have their strengths, but they’re not the right tool for every job, especially when it comes to deeply burnt-on grease.
The Problem with the “Fizz Trick”
It looks compelling: sprinkle baking soda, pour vinegar, watch the foam erupt. But that foam’s main job is simply releasing carbon dioxide in a neutralization reaction. Baking soda (a base) reacts with vinegar (an acid), and in the process, both are transformed into something gentler, closer to salty water with a little buffer. It’s mildly helpful for some kinds of grime, but it’s not targeted for heavy, carbonized fat.
Dish soap, meanwhile, doesn’t waste its energy on an impressive reaction. It stays intact and focused. The surfactants don’t neutralize each other—they just go after the grease, binding to it, loosening it, breaking it up into pieces that the water can carry away.
Think of it like this: if burnt grease is a story layered over time on the surface of your pan, baking soda and vinegar are loud critics at the door, banging but never quite getting inside. Dish soap is the archivist who patiently reads the glue holding every page together—then quietly undoes it.
Choosing the Right Allies: Pans, Tools, and Time
Not every pan is the same, and not every tool is a good match. When you’re gently battling burnt grease, you’re also in conversation with the material of your cookware. And like people, some pans are more sensitive than others.
Tools and Materials: What Plays Nicely Together
| Pan Type | Best Cleaning Approach | What to Avoid |
|---|---|---|
| Stainless steel | Hot dish soap soak, nylon scrubber, plastic scraper | Steel wool (regular use can scratch and dull) |
| Nonstick (Teflon, ceramic) | Warm–hot dish soap soak, very soft sponge or cloth | Metal utensils, abrasive pads, harsh powders |
| Cast iron (seasoned) | Hot water, brief dish soap soak only if needed, gentle scraper, re-oil afterward | Long, soapy soaks that strip seasoning completely |
| Enameled cast iron | Hot dish soap soak, non-scratch scrub brush | Metal scouring pads that can chip enamel |
When in doubt, err on the side of gentle tools and more time. A few extra minutes of soaking beats a lifetime of scratches and slowly ruined nonstick any day.
Layered Mess, Layered Magic: When Grease Has History
There’s a particular kind of burnt grease that doesn’t come from one bad night. It comes from years of small overcooks, tiny spills, edges of sauces bubbling over and never fully wiped away. These are the dark rings around the base of your pans, the brown halo on the outside of a saucepot, the shadowy outline around the burner that never seems to come clean.
That’s where the dish soap ritual becomes less of a one-time rescue mission and more of a quiet, ongoing relationship with your cookware.
You can think of each soak as peeling back a year. One long, hot, soapy bath followed by a careful scrub might take off the obvious layer of grime. The next time you do it, maybe after another messy roast or a splattered stew, you’ll find more of that old history loosening, releasing in thin curls, rinsing away. Over time, the metal that had started to feel permanently stained begins to show its original color again. The handles lose their tacky film. The base of the pot stops feeling sticky around the edges.
This isn’t about making your pans look brand new; it’s about bringing them back to a place where you enjoy using them, where you aren’t embarrassed to set them on the table, where you feel like you and your tools are on the same side.
Adding a Gentle Boost (Without Breaking the “No Baking Soda or Vinegar” Rule)
You don’t need baking soda or vinegar for this process to work—but if you absolutely want a little extra grit for stainless steel or enameled cast iron, you can use a tiny amount of a mild, cream-based cleanser after the soak, as long as it’s designed for cookware. Use it sparingly; think of it as a finishing move, not the main event. And always follow it with a rinse and a moment to run your hand over the surface, feeling how much smoother it’s become.
A New Kind of Kitchen Ritual
There’s something surprisingly comforting in turning a dreaded task into a small ritual. A burnt pan used to feel like a quiet failure, an eye-roll moment you wanted to hide under a pile of soapy bubbles. But when you know what to do—when you have a method that actually works—burnt grease becomes less of a judgment, more of a simple fact: cooking is messy. Heat is wild. Things happen. And you know how to respond.
Next time you pull a pan off the stove and see that blackened ring or stubborn, glossy patch of dark residue, resist the urge to attack it immediately with all your strength and all your old tricks. No frantic baking soda mountain. No vinegar volcano. Instead, let the moment soften.
Fill the sink with hot water. Add that generous ribbon of dish soap. Watch the water go cloudy, the surface shimmer slightly as the soap disperses. Place the pan in, hear the tiny hiss as warm metal meets warmer water. Then walk away. You’ve already done the hardest part: deciding not to fight.
When you come back later and drag a gentle scraper across the bottom, you might feel a small, private satisfaction as the burnt layer slides away more easily than you expected. No drama. No brute force. Just chemistry, patience, and a little respect for the quiet magic happening beneath the surface.
In that moment, your kitchen feels a bit more like a place you belong in—not because you never burn anything, but because you know how to make things right when you do.
FAQs
Can I really skip baking soda and vinegar entirely?
Yes. For burnt grease specifically, a hot, concentrated dish soap soak is often more effective, especially when the residue is thick and carbonized. Baking soda and vinegar aren’t harmful here, but they’re not necessary and can be less efficient for this type of mess.
How long should I soak a badly burnt pan?
For most messes, 30–60 minutes in very hot, soapy water is enough. For extremely burnt or old buildup, soak for several hours or overnight. If needed, repeat the process rather than resorting to harsh abrasion.
Is it safe to soak nonstick pans in hot, soapy water?
Yes, in most cases. A warm to hot dish soap soak is generally safe for modern nonstick coatings. Just avoid metal scouring pads or sharp scrapers, and check the manufacturer’s instructions if you’re unsure.
What if the burnt grease doesn’t come off after one soak?
Simply repeat the soak. Some long-standing or very thick burnt layers peel off in stages. Each round of soaking and gentle scraping typically removes more residue without damaging the pan.
Does this method work on the outside of pans too?
It does. You can lay the pot or pan on its side in the sink, fill with hot, soapy water, and rotate to let different sections of the outside soak. Use a soft brush or non-scratch pad to help lift loosened grime afterward.
Will dish soap ruin the seasoning on my cast iron?
Occasional, brief soapy soaks won’t destroy a well-established seasoning, but long, repeated soaks can strip it. For cast iron, use hot water first, add a tiny bit of dish soap only if needed, scrub gently, then dry thoroughly and rub with a thin layer of oil before storing.
Is there a particular type of dish soap that works best?
A good-quality, grease-cutting liquid dish soap works best. It doesn’t need to be fancy—just formulated to handle oils and fats. The key is hot water, a generous amount of soap, and enough time for the soak to do its work.