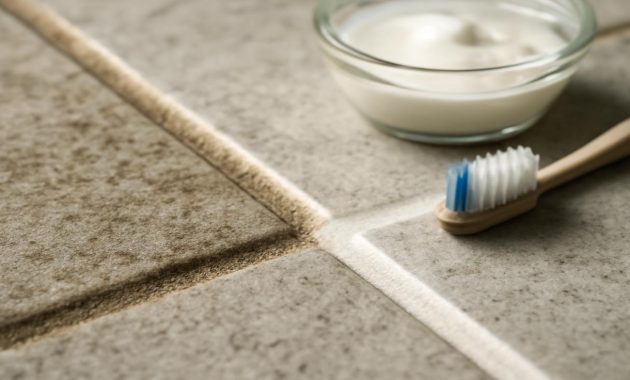
The first thing you notice isn’t the tiles. It’s the lines between them—the grout, that once-quiet background character now shouting in shades of brown and gray. You run a fingertip over it and feel the roughness, the slight grit, and that faint, sour scent of old moisture that never seems to leave a bathroom. It doesn’t matter how beautiful the tiles are. If the grout looks tired, the whole room feels tired with it.
The Afternoon You Finally Decide You’ve Had Enough
It usually happens on a day when you hadn’t planned on cleaning at all. Maybe you’d only meant to wipe the mirror, maybe just to hang a fresh towel. But then the low winter light comes in at the wrong angle—or the right one—and suddenly every line of grout stands out like a contour map of neglect.
You pause. Knees slightly bent, shoulders leaning in, eyes tracing that crooked path along the floor and wall. It’s not black mold, not exactly; it’s more like a watercolor of time: soap scum, hard water, stray shampoo drips, and the muddy imprint of a hundred hurried mornings. You remember how it looked when it was new: pale, unassuming, crisp around each tile like a fine pencil line.
You could, of course, ignore it. You could keep stepping over it, letting your brain blur it into background noise. You could buy another clever product in a bright plastic bottle that promises miracles but smells like an industrial accident. Or—today of all days—you could reach for three things you probably already own, mix them in a small bowl, and change the entire mood of the room in less time than it takes to watch an episode of your favorite show.
This is a story about those fifteen minutes. About the small chemistry of everyday life, the quiet satisfaction of transformation, and the strange intimacy of getting down on your hands and knees to meet your home at eye level.
The Little Bowl of Alchemy
The hero of this story isn’t glamorous. It starts with a bowl—an old ceramic one, perhaps, the one with a tiny chip on the rim. Into it, you add three ingredients that live quiet, ordinary lives in the corners of your kitchen and cleaning cupboard. Together, though, they become something else entirely.
The first is baking soda. Fine, soft, almost shy, it pours like pale sand into the bowl. It doesn’t sting your nose, doesn’t scorch your skin; it simply waits. Baking soda is the gentle scrubber, the soft voice that lifts stains without scratching tile. When you touch it, it feels like the coastline between powder and grains, a little gritty, a little tender.
The second is white vinegar. This one arrives with personality. You crack open the bottle, and the sharp tang blooms into the air, bright and insistent. Vinegar is the truth-teller: acidic, uncompromising, good at cutting through the hidden build-up that pretends to be part of the grout. When it meets the baking soda in the bowl, the surface fizzes to life. Tiny bubbles rise, whispering that something is happening—something microscopic and impatient.
The third is dish soap. Just a small squeeze. It trails into the mixture in a glossy ribbon, catching the light like liquid glass. Dish soap is the mediator, the bridge between grime and water. It loosens oils, softens the edges of stubborn stains, and gives your mixture just enough body to cling to vertical lines of grout without immediately sliding down in surrender.
You stir. The bowl comes alive in your hands: fizzing, thickening, changing color slightly as the three strangers learn to cooperate. The scent is sharp but not unpleasant—vinegar-forward, grounded by the almost comforting familiarity of dish soap. You’re not holding a product. You’re holding a small handmade solution, tailored by your own hand to your own space.
There is something deeply satisfying in this. No harsh warning labels, no neon liquid that looks like it could strip paint off a ship. Just pantry and under-sink staples, reintroduced to each other for a new purpose.
The Simple Grout Mixture (Approximate Ratios)
| Ingredient | Amount | Role |
|---|---|---|
| Baking soda | 1/2 cup | Gentle abrasive to lift stains |
| White vinegar | 1/4 cup (added slowly) | Dissolves mineral and soap deposits |
| Dish soap | 1–2 teaspoons | Cuts grease, helps mixture cling to grout |
Getting Down to Tile Level
You don’t clean grout standing up. Not really. To see it honestly, you need to lower yourself down into its world. Knees on a folded towel, fingers brushing the coolness of tile, you dip an old toothbrush or small scrub brush into the bowl.
The mixture clings to the bristles, thick and slightly foamy. When you bring it to the wall or floor, there’s that soft sound—the almost-silent drag of brush over ceramic, the faint effervescent hiss as the paste meets old grime. You trace the lines, painting them with intention: up one column, across one row, working in neat sections so you don’t lose where you’ve been.
It doesn’t have to be perfect. There’s no inspector coming, no contest for straightest grout line. This is just you, moving slowly, letting your body fall into the rhythm of it. Dip, dab, scrub. Dip, dab, scrub. The scent of vinegar rises again, but it feels cleaner now, less like a salad and more like a reset button.
As you work, time behaves strangely. You’re not lost in an endless chore; instead, you’re wrapped in a small project that has an obvious border and an obvious reward. Each row you cover in the pale, cloudy paste becomes a line of possibility. Beneath that mask of white surging foam, the tired grout is waiting for its second chance.
When the section is fully coated, you sit back on your heels and look at it: a grid of wet, pale lines, like someone took chalk to your bathroom. It doesn’t look better yet—but you didn’t expect it to. The magic is about to happen in the quiet, while you walk away.
The Quiet Fifteen Minutes
You set a timer. Fifteen minutes. It’s not long enough to leave the house or start a complicated project, but it’s more than enough for a small, luxurious pause. You rinse your hands under warm water, breathing in the subtle soapiness, and step back from the tiled canvas.
The room smells a little like vinegar, a little like effort, and strangely, a little like anticipation. Those fifteen minutes belong to the mixture now: the baking soda patiently scrubbing, the vinegar dissolving, the dish soap sneaking into tiny pores of dirt and coaxing them loose. A gentle, invisible storm is rolling through the grout lines.
While it works, you move through your home. Maybe you make tea and blow across the surface of the mug, watching the steam curl into shapes that remind you of the cleaning foam still working, unseen. Maybe you open a window and feel the cool rush of outdoor air slip inside, pushing out the heaviness of stale humidity. Maybe you just sit on the edge of your bed and notice, for once, how many small tasks you do in a day that never fully finish. This one will. That thought is surprisingly soothing.
When your timer chimes, it’s not an alarm. It’s an invitation—to come and see what has quietly changed while you weren’t looking.
Step-by-Step: The 15-Minute Grout Revival
| Step | Action | Time Needed |
|---|---|---|
| 1 | Mix baking soda, vinegar, and dish soap in a bowl to form a thick paste. | 3–4 minutes |
| 2 | Apply mixture to grout lines with a small brush. | 5–7 minutes |
| 3 | Let it sit and work on the stains. | 15 minutes (hands-off) |
| 4 | Lightly scrub and rinse or wipe clean. | 5–8 minutes |
The Reveal: When Old Grout Looks Young Again
Back in the bathroom, the paste has softened, duller now, drying a little at the edges. You turn on the tap and let warm water run into a bucket or onto a cloth, the sound steady and reassuring. With your brush or a fresh sponge, you begin to wipe.
The first swipe is subtle but undeniable. Under the dissolving film of white, a line of grout emerges that is several shades lighter than the one beside it you haven’t rinsed yet. It looks…clean. Not bleached into oblivion, not artificially brightened, but restored. Like someone turned back a page in the book of your everyday mess.
You keep going: scrub, wipe, rinse. Each line you reveal is a quiet little surprise. The tiles seem sharper, crisper somehow, as if they were slightly out of focus before. Even the feel under your fingers has changed—the grout is smoother, less gritty with residue, more like a finished surface and less like a sponge for the past.
The room lightens as you work, not just visually but emotionally. Something about watching a simple mixture undo months or years of build-up feels almost like witnessing forgiveness in physical form. No lectures, no shame—just, “Let’s start over.” Twenty minutes ago, you were looking at a floor that made you sigh. Now it looks like the kind that makes you want to walk barefoot, just to feel the cool, clean lines under your toes.
When you finally step back, rinse the last of the foam down the drain, and hang a fresh towel, the transformation is quiet but radical. Tile that looked resigned now looks alert. A room that felt a little weary now feels like it took a deep breath.
Keeping That “Just-Cleaned” Feeling Alive
| Habit | How Often | Why It Helps |
|---|---|---|
| Quick wipe after showers | Daily | Stops soap scum and moisture from settling into grout. |
| Spot-clean dark spots | Weekly | Prevents small stains from becoming full grout discoloration. |
| Full mixture treatment | Every 1–3 months | Keeps grout looking “like new” with minimal effort. |
The Gentle Science Behind the Magic
There’s nothing supernatural about what happens in those fifteen minutes, but knowing the “why” behind the “wow” can make the process feel even more satisfying.
Baking soda is a mild alkali. That means it helps break down the kind of greasy, sticky film that clings to grout from soaps, shampoos, and skin oils. Its tiny crystals add just enough friction to scrub without scratching most tiles. When you rub it along the grout lines, you’re giving the surface a micro-exfoliation of sorts.
Vinegar is mildly acidic. Many of the stains hiding in grout—especially in bathrooms and kitchens—come from minerals in hard water. These leave behind stubborn deposits that soaps alone can’t fully remove. Vinegar loosens these mineral stains, dissolving them from the inside out. When it hits the baking soda, the fizzing you see is carbon dioxide being released as the acid and alkali react. That bubbling action helps lift grime from tiny crevices where your brush can finish the job.
Dish soap is a surfactant—it lowers the surface tension of water, allowing it to spread more easily and slip under oily residues. It’s the peacemaker between water and grease, convincing them to let go of each other. In the grout mixture, it also helps the paste cling to vertical surfaces, hugging the lines instead of sliding down the wall in defeat.
Together, these three ingredients form a kind of quiet cleaning orchestra: abrasion, acidity, and surfactant all playing their parts. And because they’re relatively gentle, they’re often kinder to your grout and tiles than some harsh commercial options that promise “instant” results but can eat away at materials over time.
Of course, grout is different from home to home—sand-based, epoxy, sealed, or unsealed. But part of the beauty of this mixture is its balance. It’s powerful enough to make a visible difference, yet humble enough that, in most cases, it won’t bully your surfaces into damage.
When a Small Change Shifts How a Room Feels
There’s a moment, after you’ve finished, when you walk out of the room and then come back in—as if visiting for the first time. Your eyes catch on the now-crisp grid of grout. The tiles look more intentional, more designed. The entire space feels cleaner, even if all you really did was tend to the tiny rivers running between each square.
It’s easy to overlook grout. It’s not glamorous. It doesn’t shine like chrome or shimmer like glass. But it works harder than we think—bearing splashes, heat, humidity, footsteps, and every small mess of living. Giving it fifteen minutes of care feels a little bit like thanking your home for quietly holding your routine together day after day.
And maybe that’s the real gift hiding in that small bowl of baking soda, vinegar, and dish soap. Not just that your grout looks like new, but that the process folds a sense of attention back into your relationship with your space. You didn’t have to buy anything new. You didn’t have to wait days. You just paused, used what you had, and watched as the lines of your home brightened in response.
The next time you catch a glimpse of dingy grout in that slant of afternoon light, you might not feel dread rising. You might feel something closer to curiosity—a quiet confidence that in the span of fifteen unremarkable minutes, with three very ordinary ingredients, you can coax those tired lines back to life again.
Frequently Asked Questions
Is this mixture safe for all types of grout?
It’s generally safe for most standard cement-based grout lines. However, if you have colored, epoxy, or specialty grout, it’s wise to test the mixture on a small, hidden section first to make sure there’s no discoloration or unwanted reaction.
Can I use this mixture on natural stone tiles?
Be cautious with natural stone like marble, travertine, or limestone. Vinegar’s acidity can etch or dull some natural stones. If your grout is surrounded by natural stone, test in an inconspicuous spot or use a stone-safe cleaner instead.
How often should I deep clean my grout with this method?
For most homes, every one to three months is enough, depending on how heavily the area is used and how humid it is. High-traffic or moisture-prone areas like showers may benefit from more frequent treatments.
Do I need to seal my grout after cleaning?
If your grout is unsealed, sealing it after a thorough cleaning can help it stay bright longer and resist future stains. Always make sure the grout is completely dry before applying a sealer.
What if my grout still looks dark after cleaning?
Very old, deeply stained, or mold-penetrated grout may not fully return to its original color with gentle methods. A second treatment can help, but in some cases, regrouting or using a grout colorant may be the best long-term solution.
Can I store leftover mixture for next time?
It’s best to make only what you’ll use in one session. The chemical reaction between baking soda and vinegar is most active right after you mix them. Over time, the fizzing power fades, and the texture can change.
Will this mixture damage my tiles?
On most ceramic and porcelain tiles, this mixture is gentle and safe. Avoid using overly abrasive tools or scrubbing pads that can scratch glossy surfaces, and always rinse well so no residue remains.